Tale of Two Paintings—Continued
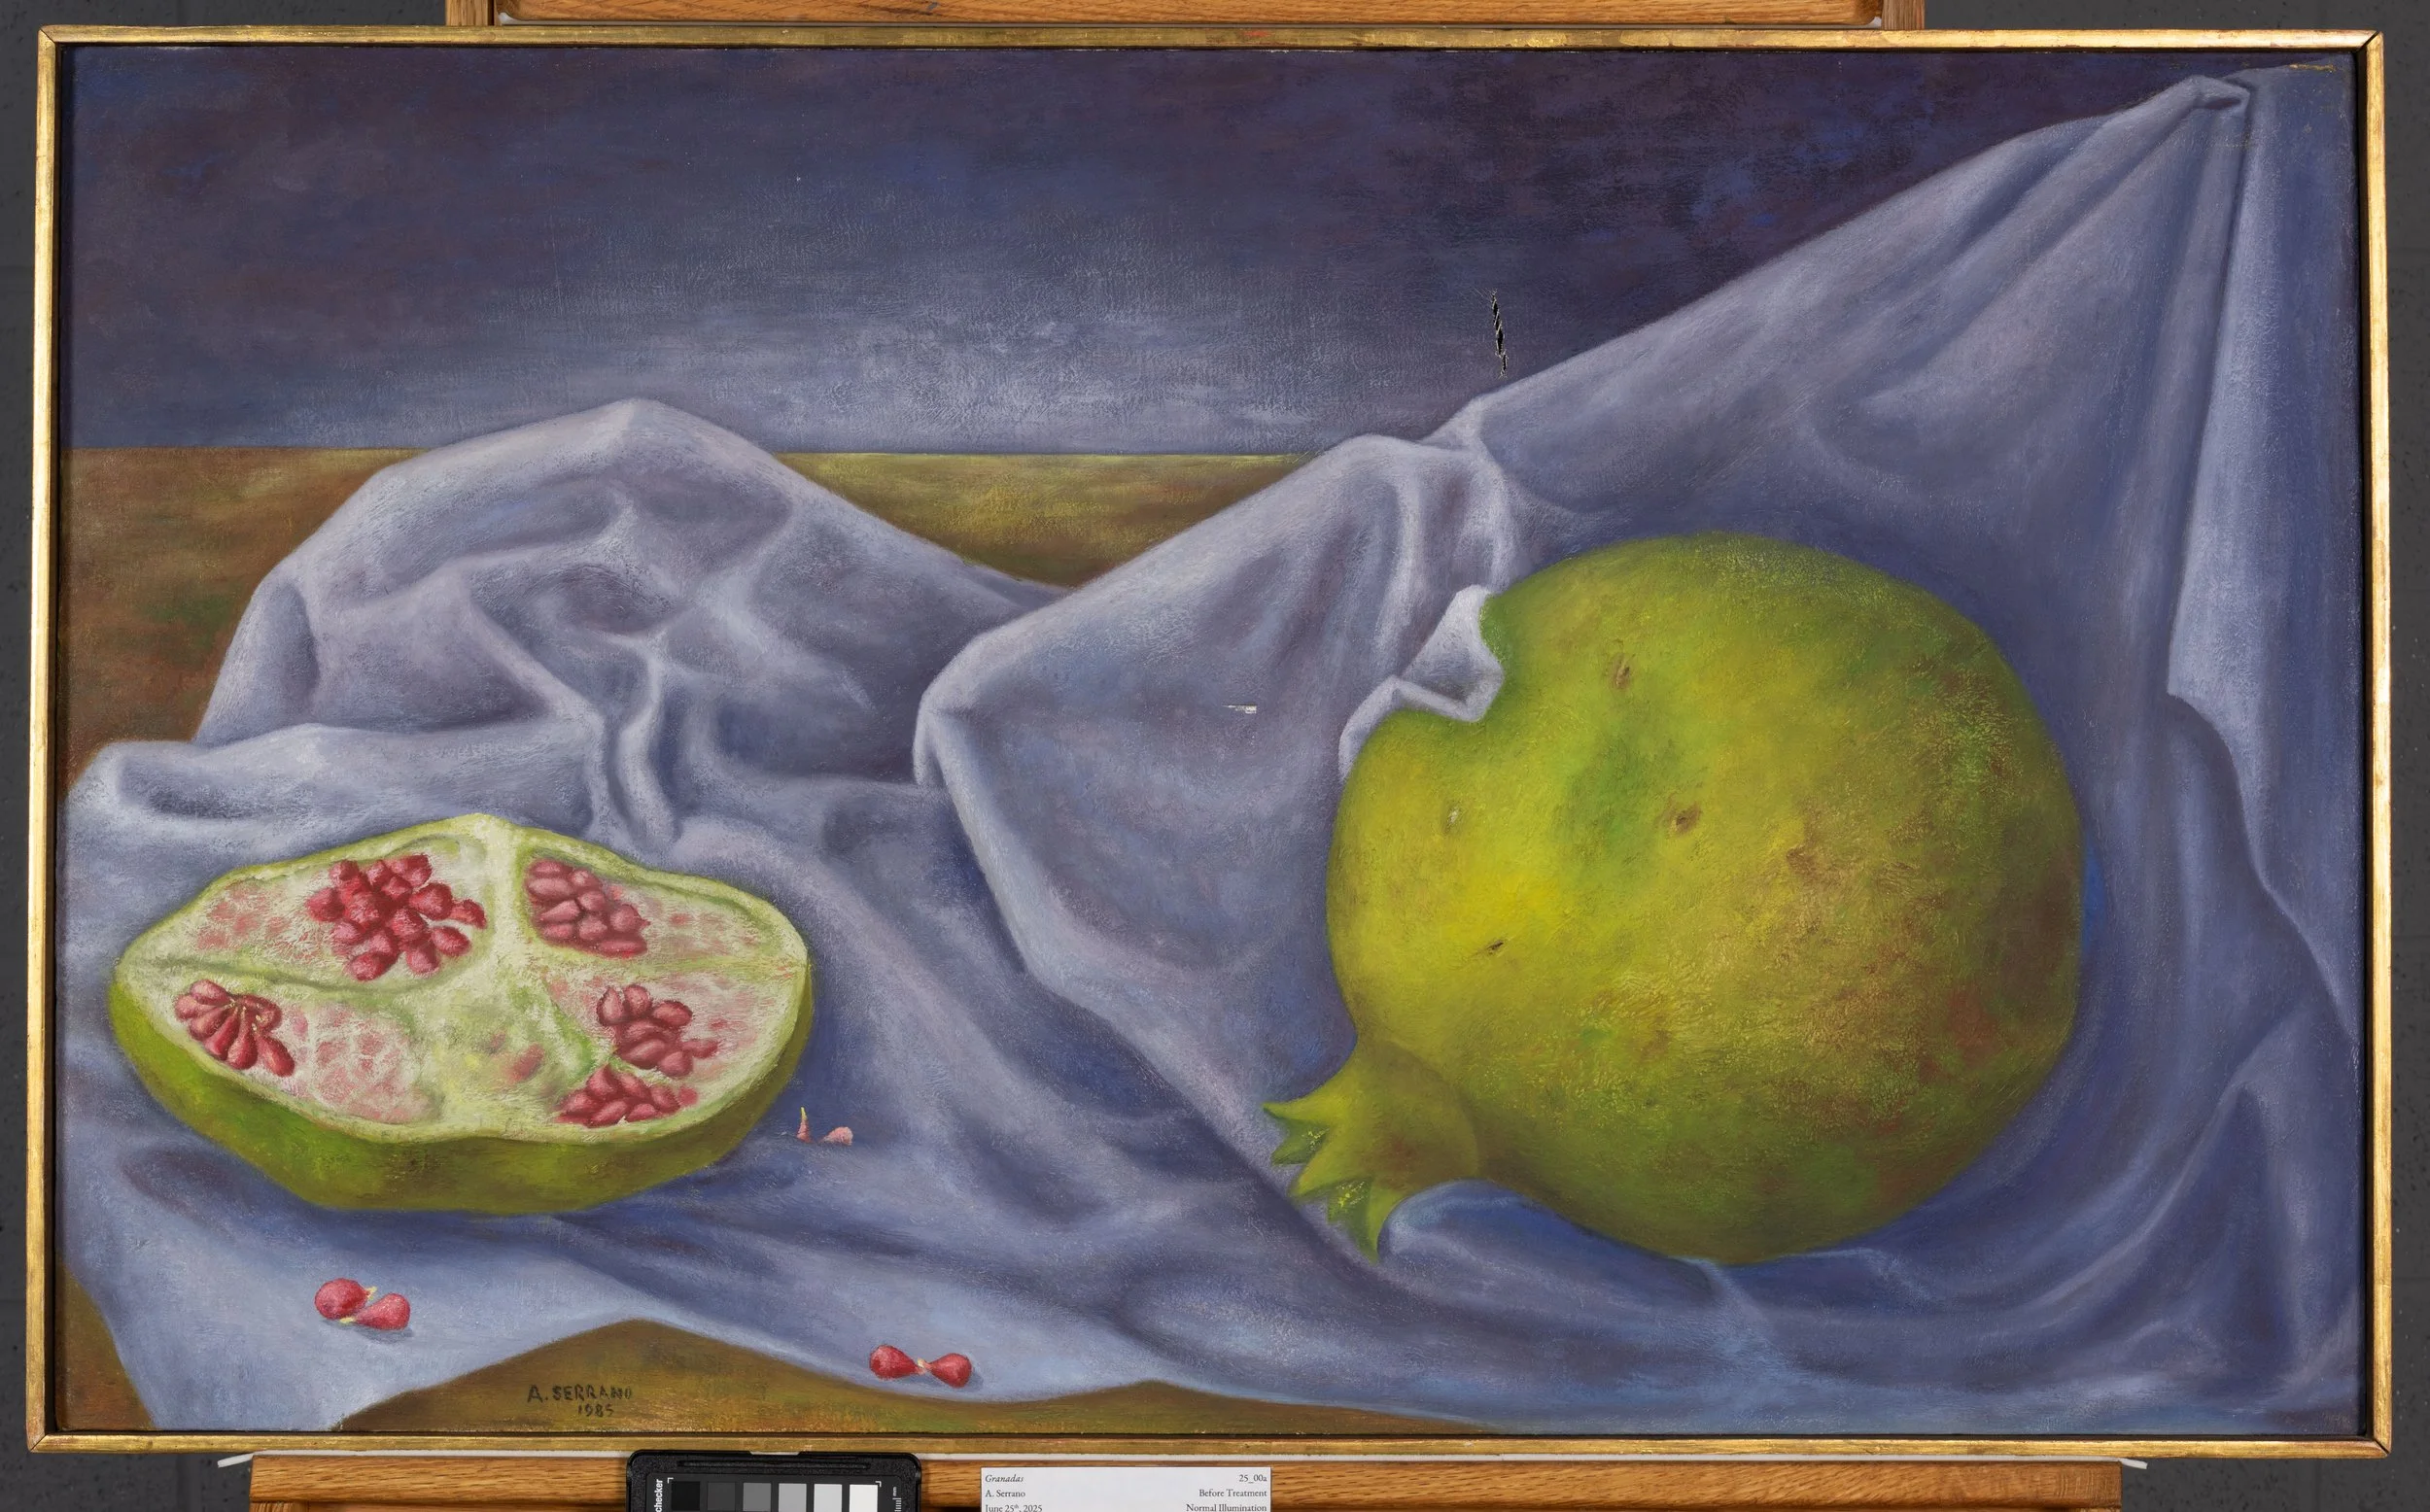
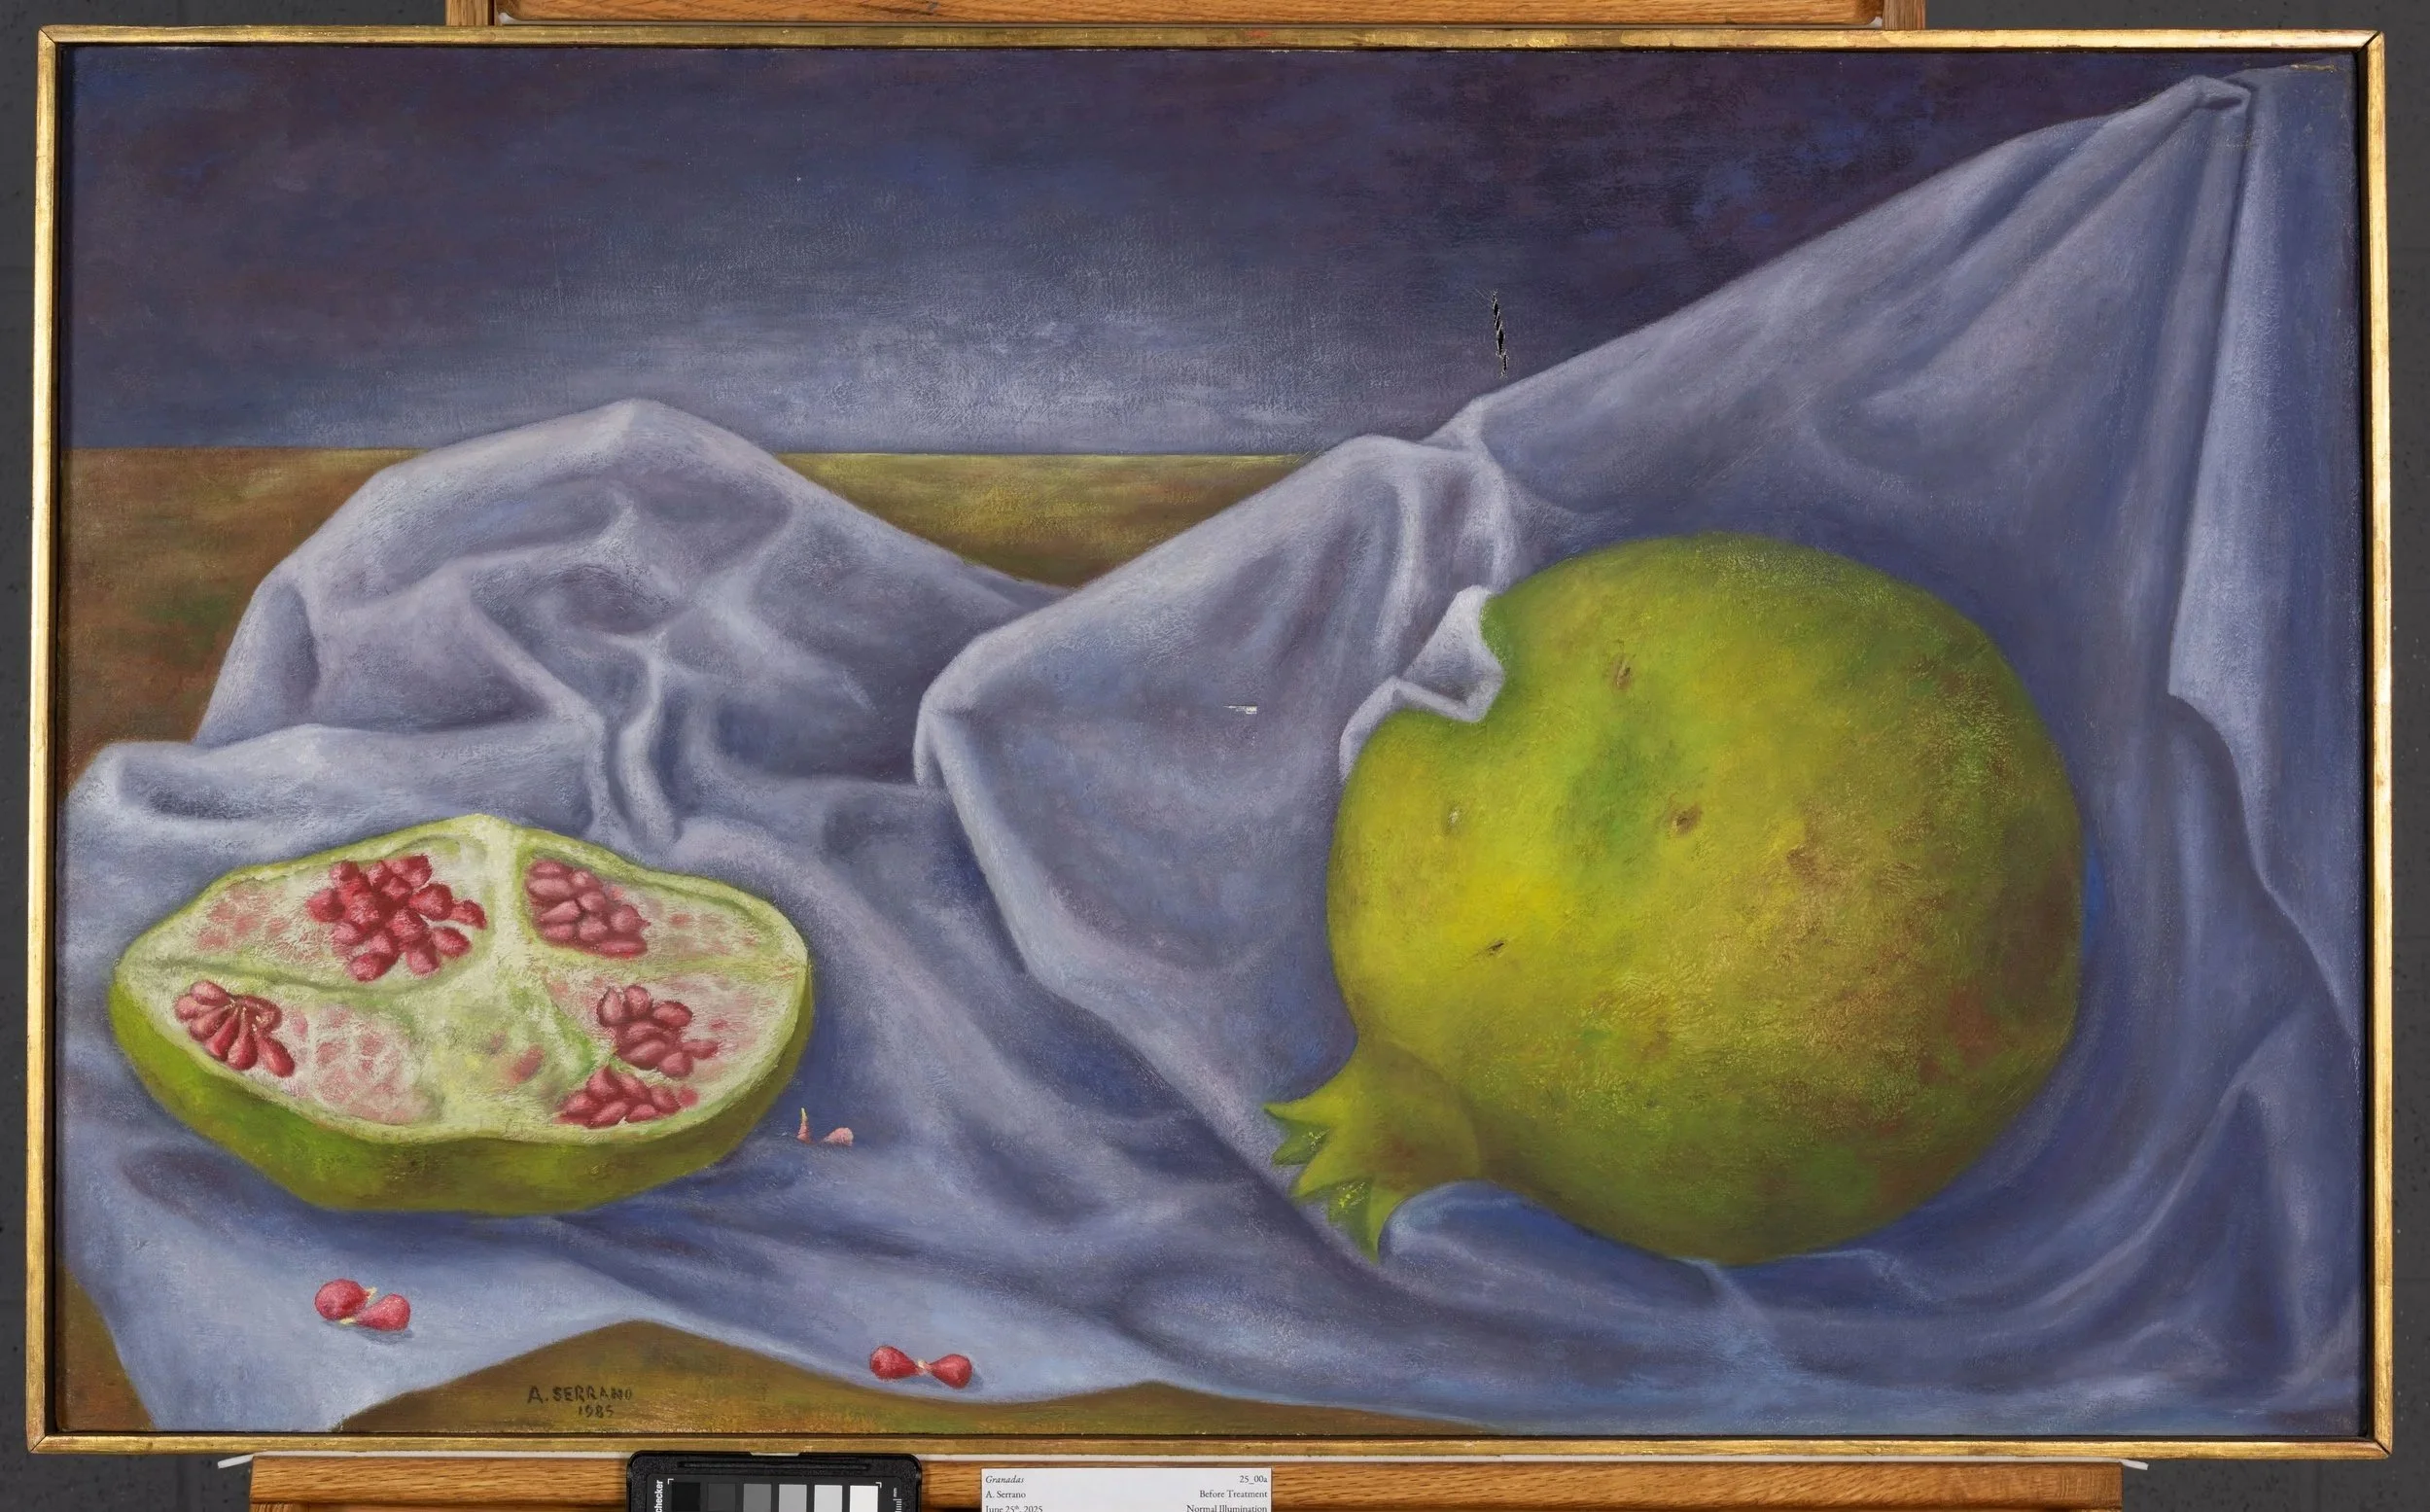
Granadas Framed Normal light before treatment, Upper left is tear,
The Problem and the Artwork
Recently, our friend and colleague, Lucia Torner, brought us two paintings both with challenging conservation problems and tears that we treated in two completely different ways. Atardecer (Translated to ‘Sunset’ in Spanish) was lined to address a complex tear , Click here to read about the first painting…
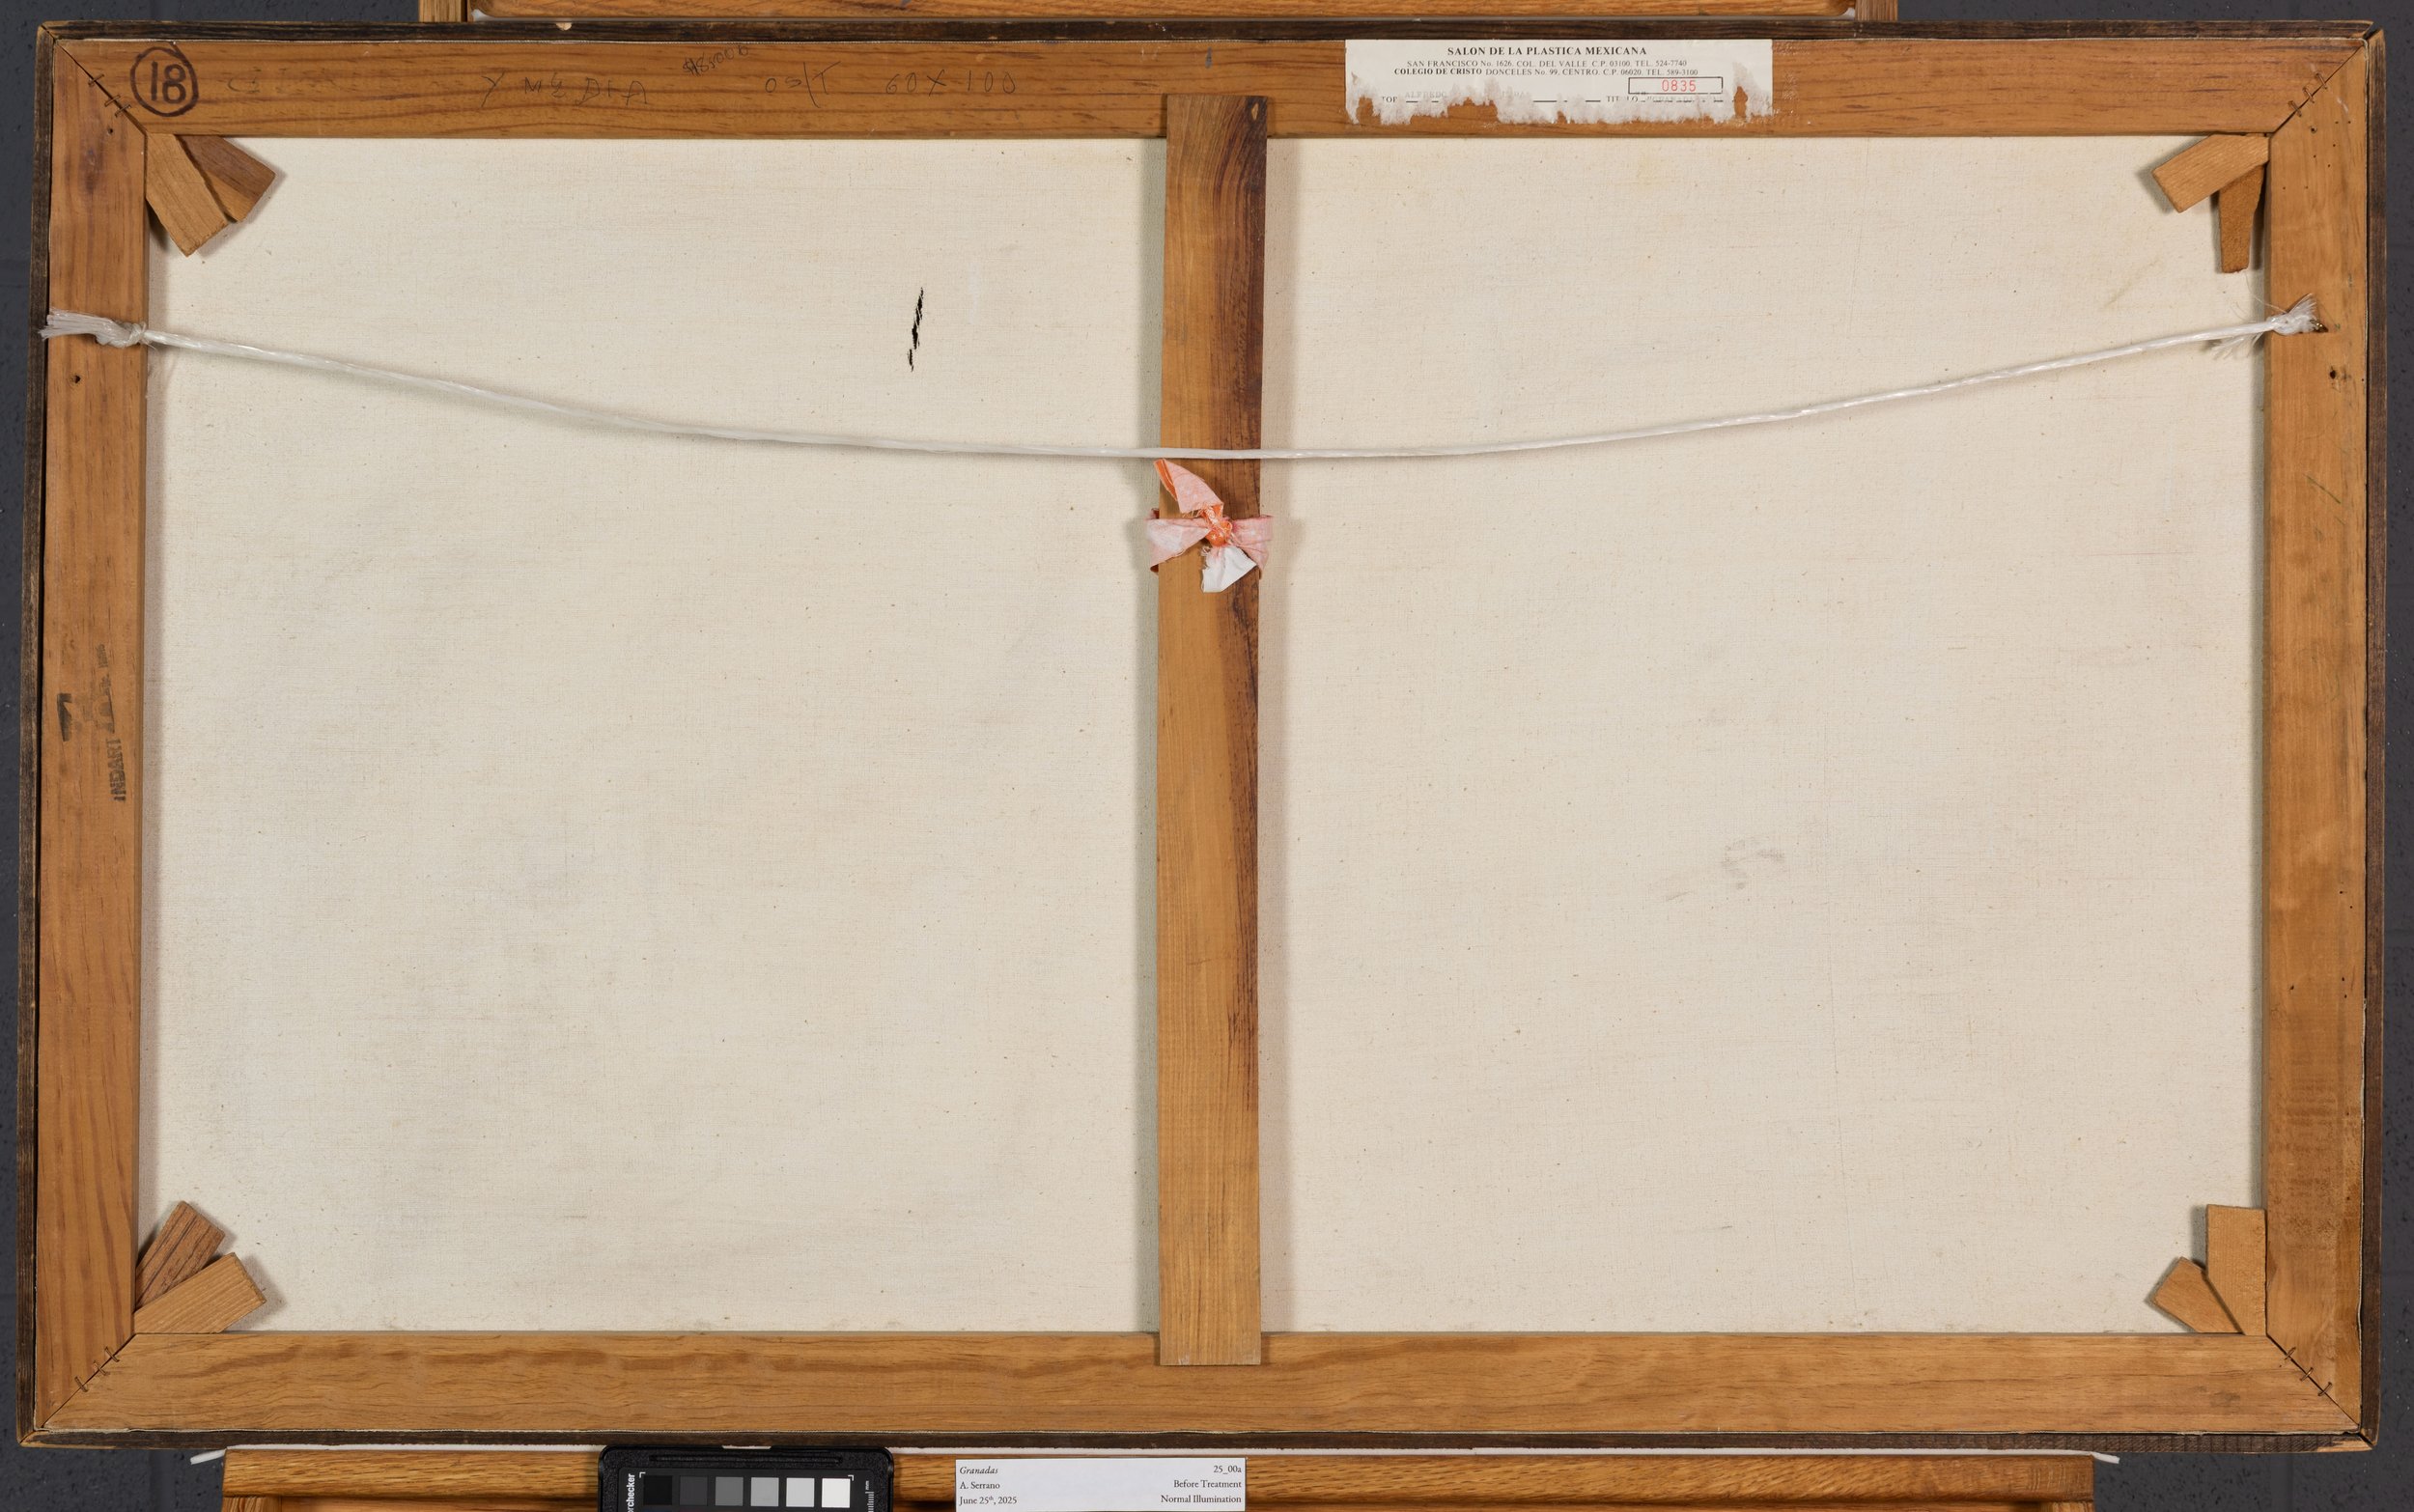
Alfredo Serrano Lara painted Granadas (Translated to ‘Pomegranates’ from Spanish) in 1985. This acrylic painting is painted on a cotton canvas with a thin white ground. It is a still life of an unripe pomegranate cut in half on top of a purple cloth. There is some impasto and no varnish. The painting is in great condition…other than the 1-½-inch vertical tear in the upper right.
The tear was gaping and no threads were connected. Usually if tears are not repaired immediately they begin to gape due to tension of the stretched painting. In order to mend this tear, we needed to use a tension device to pull the ends together.
Anatomy of an RH Trekker
Tension devices for gaping tears have been frequently used in conservation. We decided to try out a Trekker made by our colleague at RH Conservation Engineering.
The diagram below illustrates the components of the RH Trekker we used during treatment. Understanding the anatomy prior to treatment was essential. We will reference several of the terms shown in this diagram frequently throughout this article.
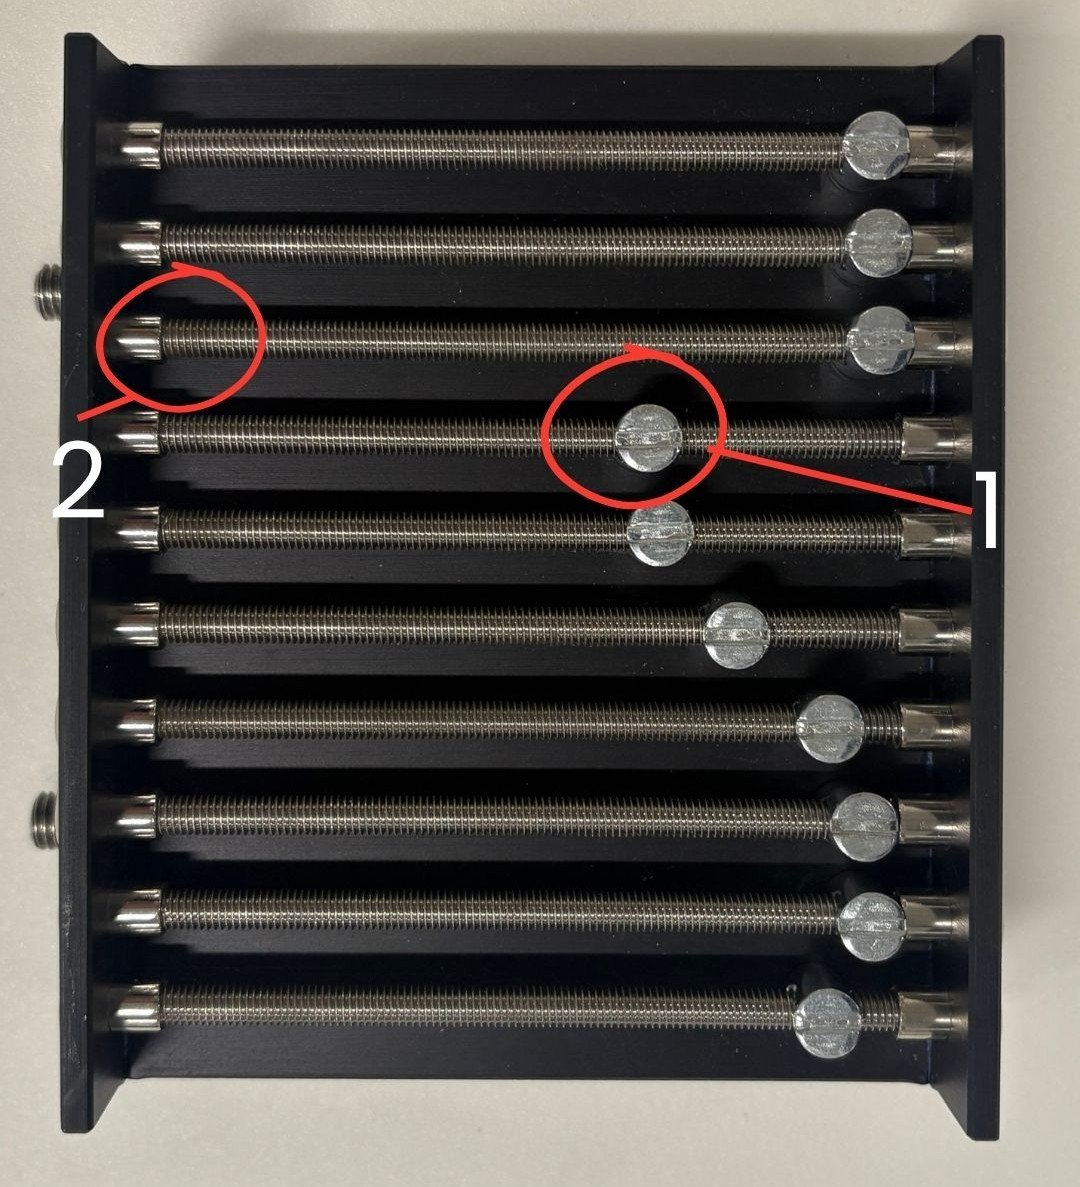
Top of Trekker
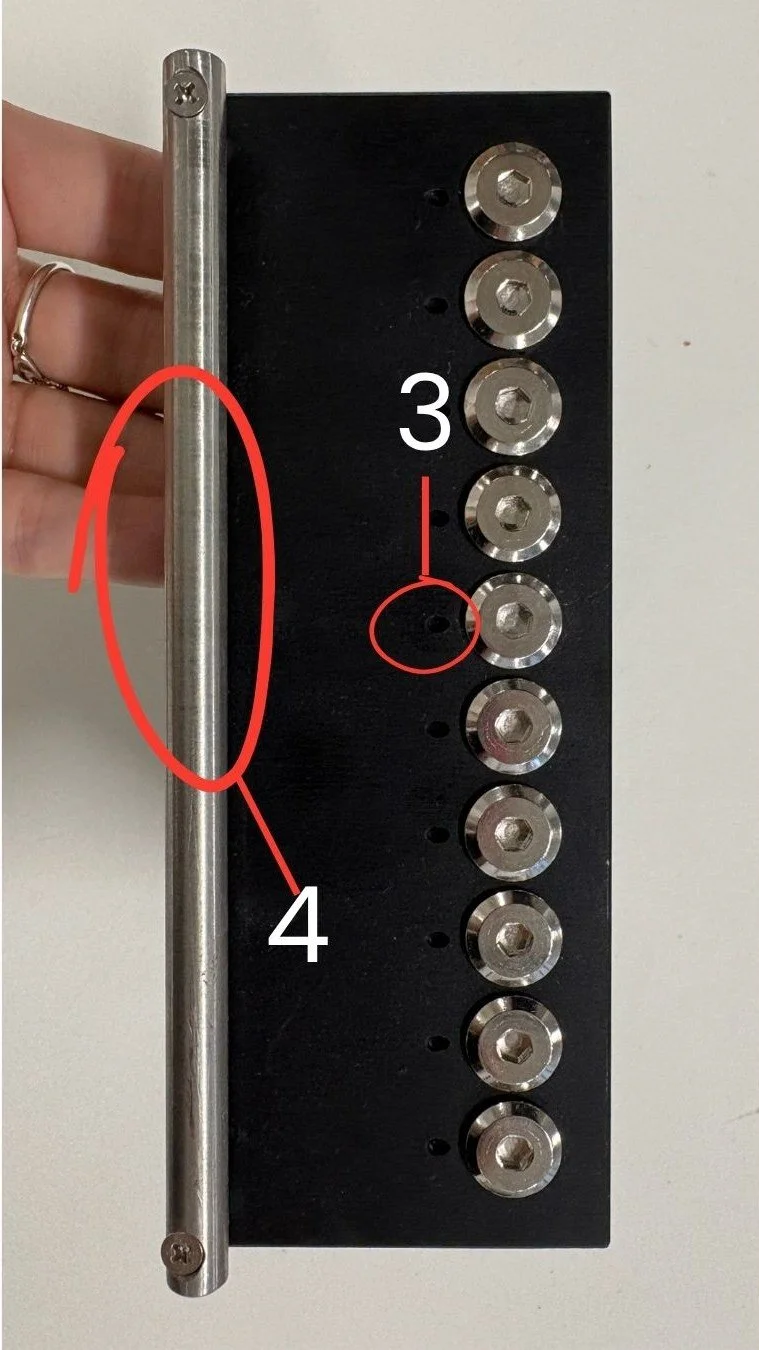
Side of Trekker
Dowel Nut
Hex Drive Flat Head Screw
Holes in which the threads are threaded though
Metal bar, faces the painting.
The Setup
Because our treatment focused on the tear in the middle, we decided to leave the strip frame attached the painting.
Before we could set up the trekker, we created a build-out to fit inside the framed perimeter so the painting could safely be placed on the table face down and to protect the back of the painting from the front weight of the trekker. We then created another build-out to go under the trekker so it lined up with the canvas (see image below). The metal bar at the front of the trekker lays on top of the canvas, to limit direct contact and avoid telegraphing of the bar a sheet of G-10 was placed between the canvas and the bar. The wood allowed for the clamping mechanism to fit tightly around the stretcher bar and strip-frame. The trekker attaches to the stretcher bars on either side of the tear.
The next step is to connect threads from one side of the tear to the opposite side of the trekker. The trekker slowly pulls the threads in a controlled manner to close the tear and allow for mending. Ideally, a thread is attached to the canvas on one side of the tear using a strong, but reversible adhesive.
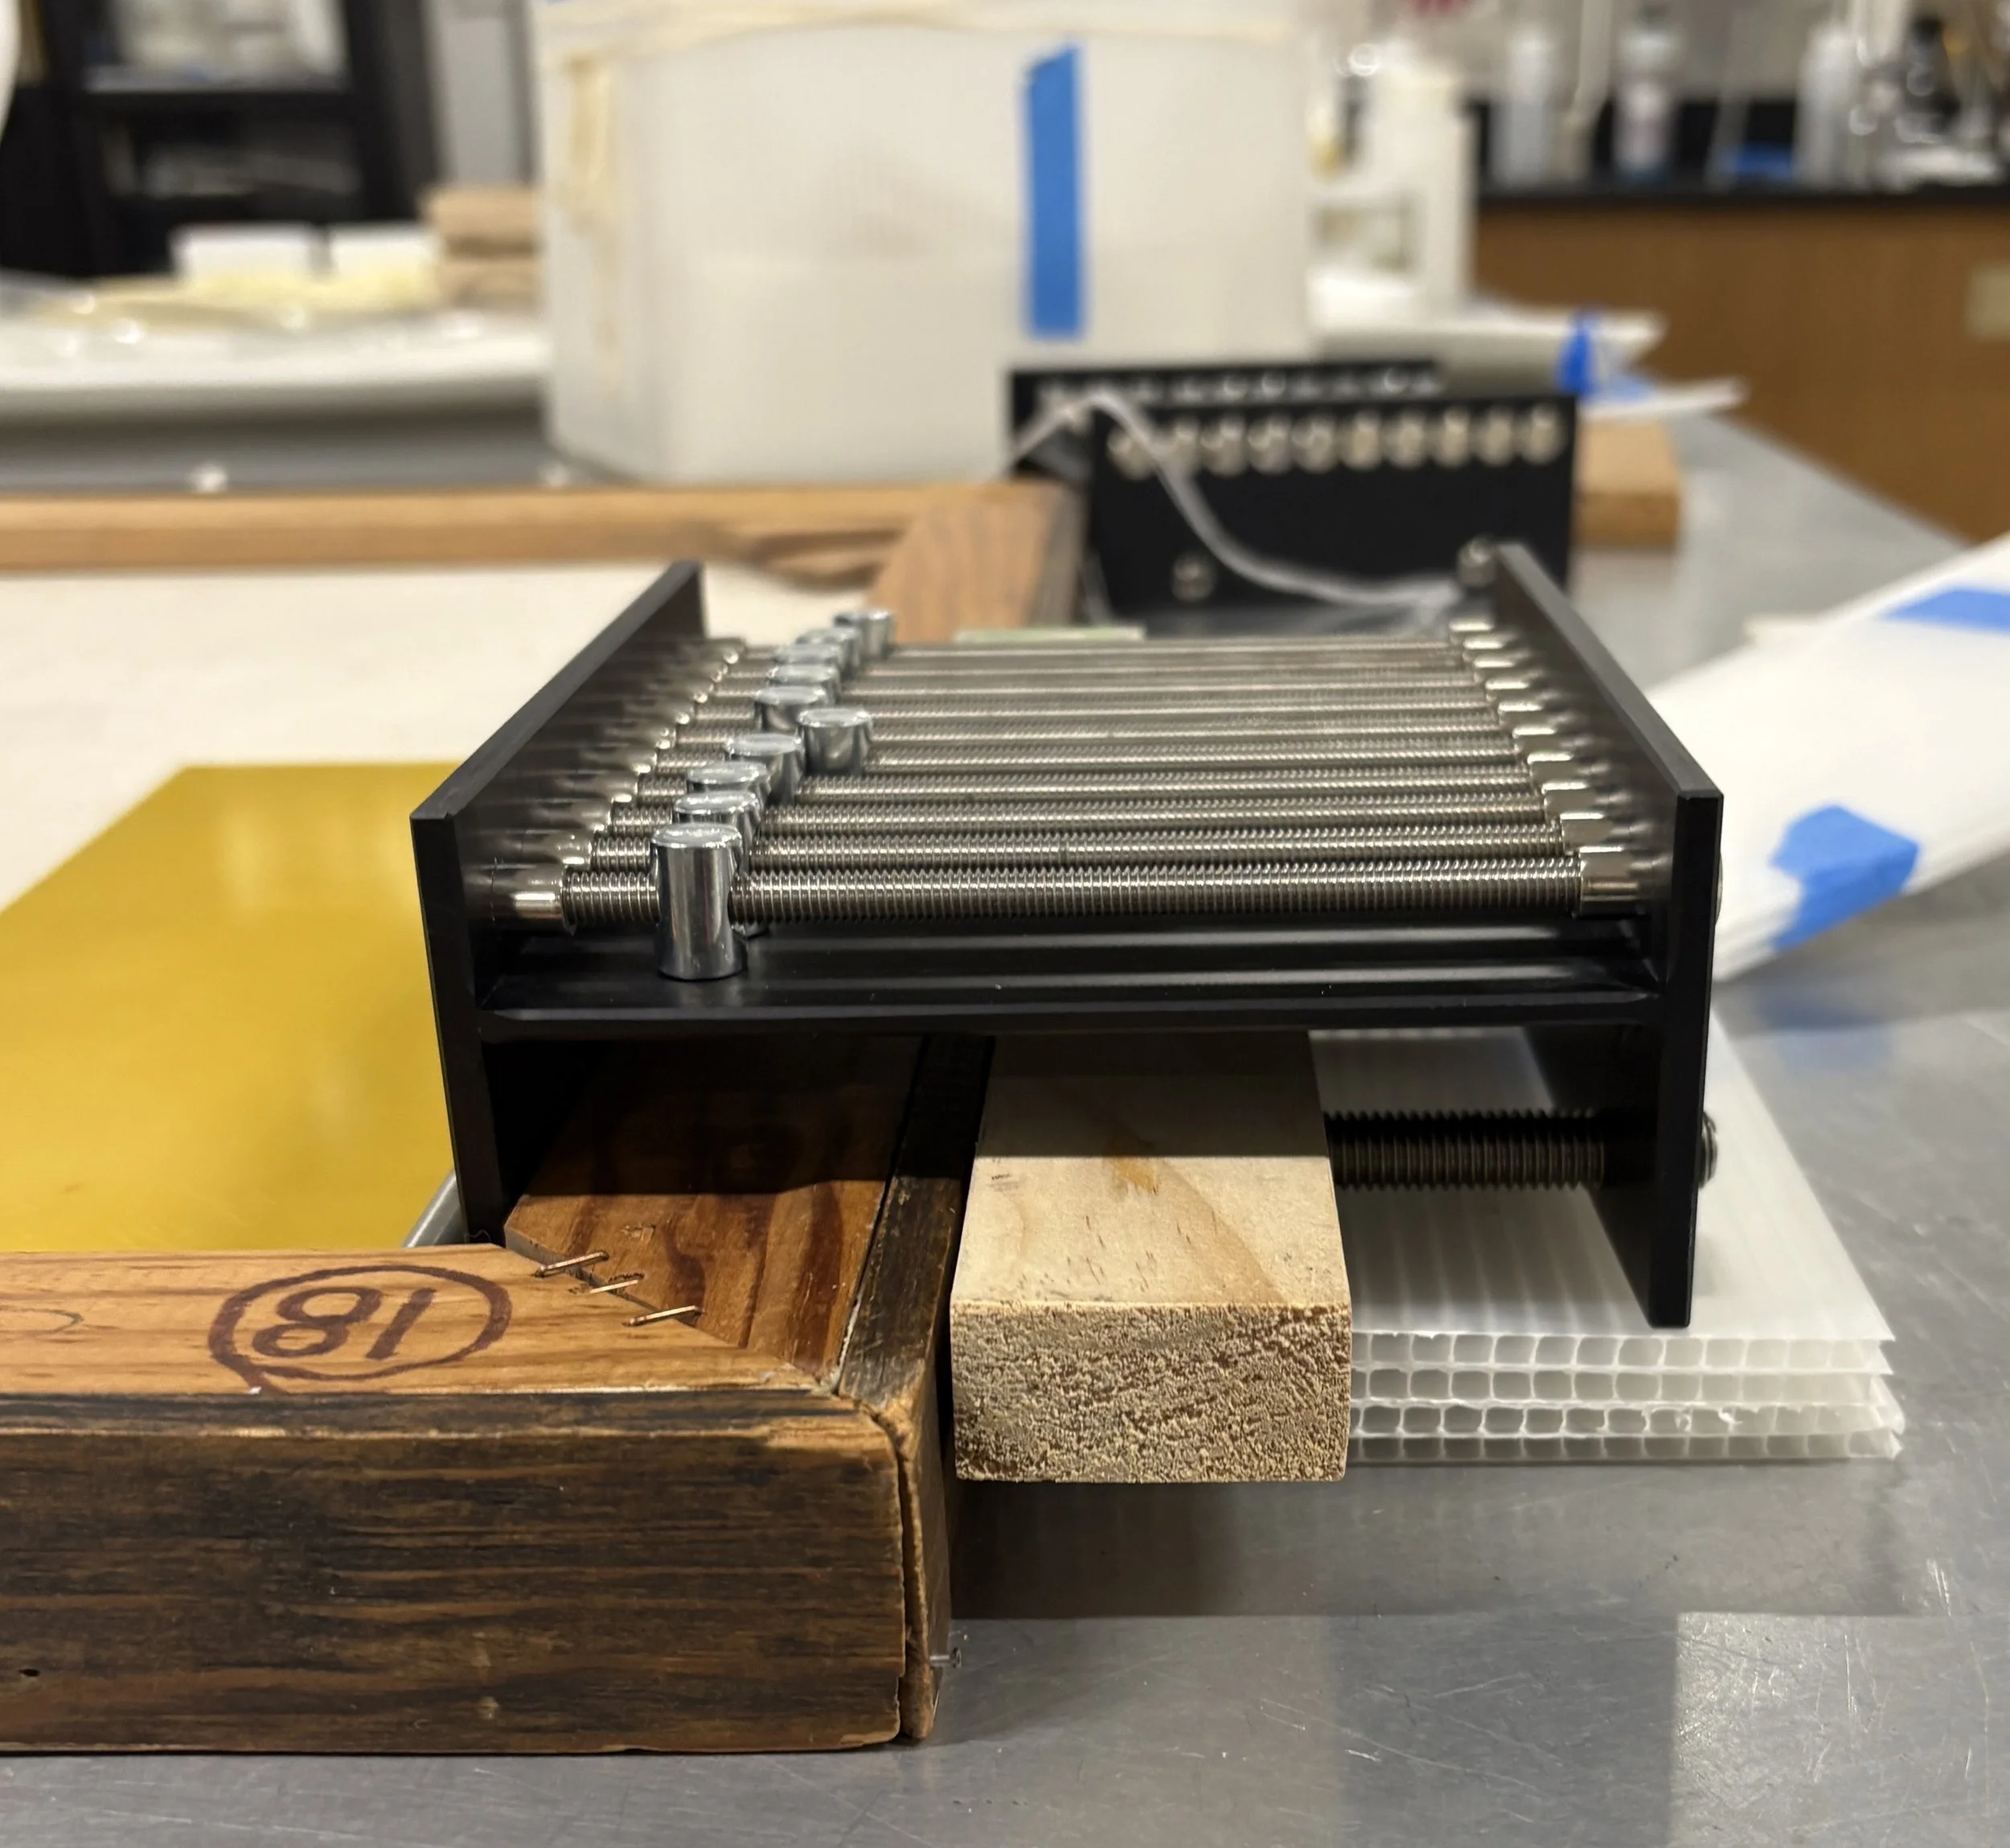
Side of RH Trekker attached to the frame perimeter.
In some of the literature we found, conservators used book binding thread to pull a tear shut. This is where things got tricky for us and our initial attempts failed. We tested multiple different kinds of threads including thick cotton, a sized cotton thread, and half a strand of Kevlar®, a heat-resistant para-aramid fiber also used in bullet proof vests! In our trial runs we found that the tensile strength required to pull the canvas together was enough to snap the threads in half. Fortunately, an entire strand of Kevlar® thread did the trick
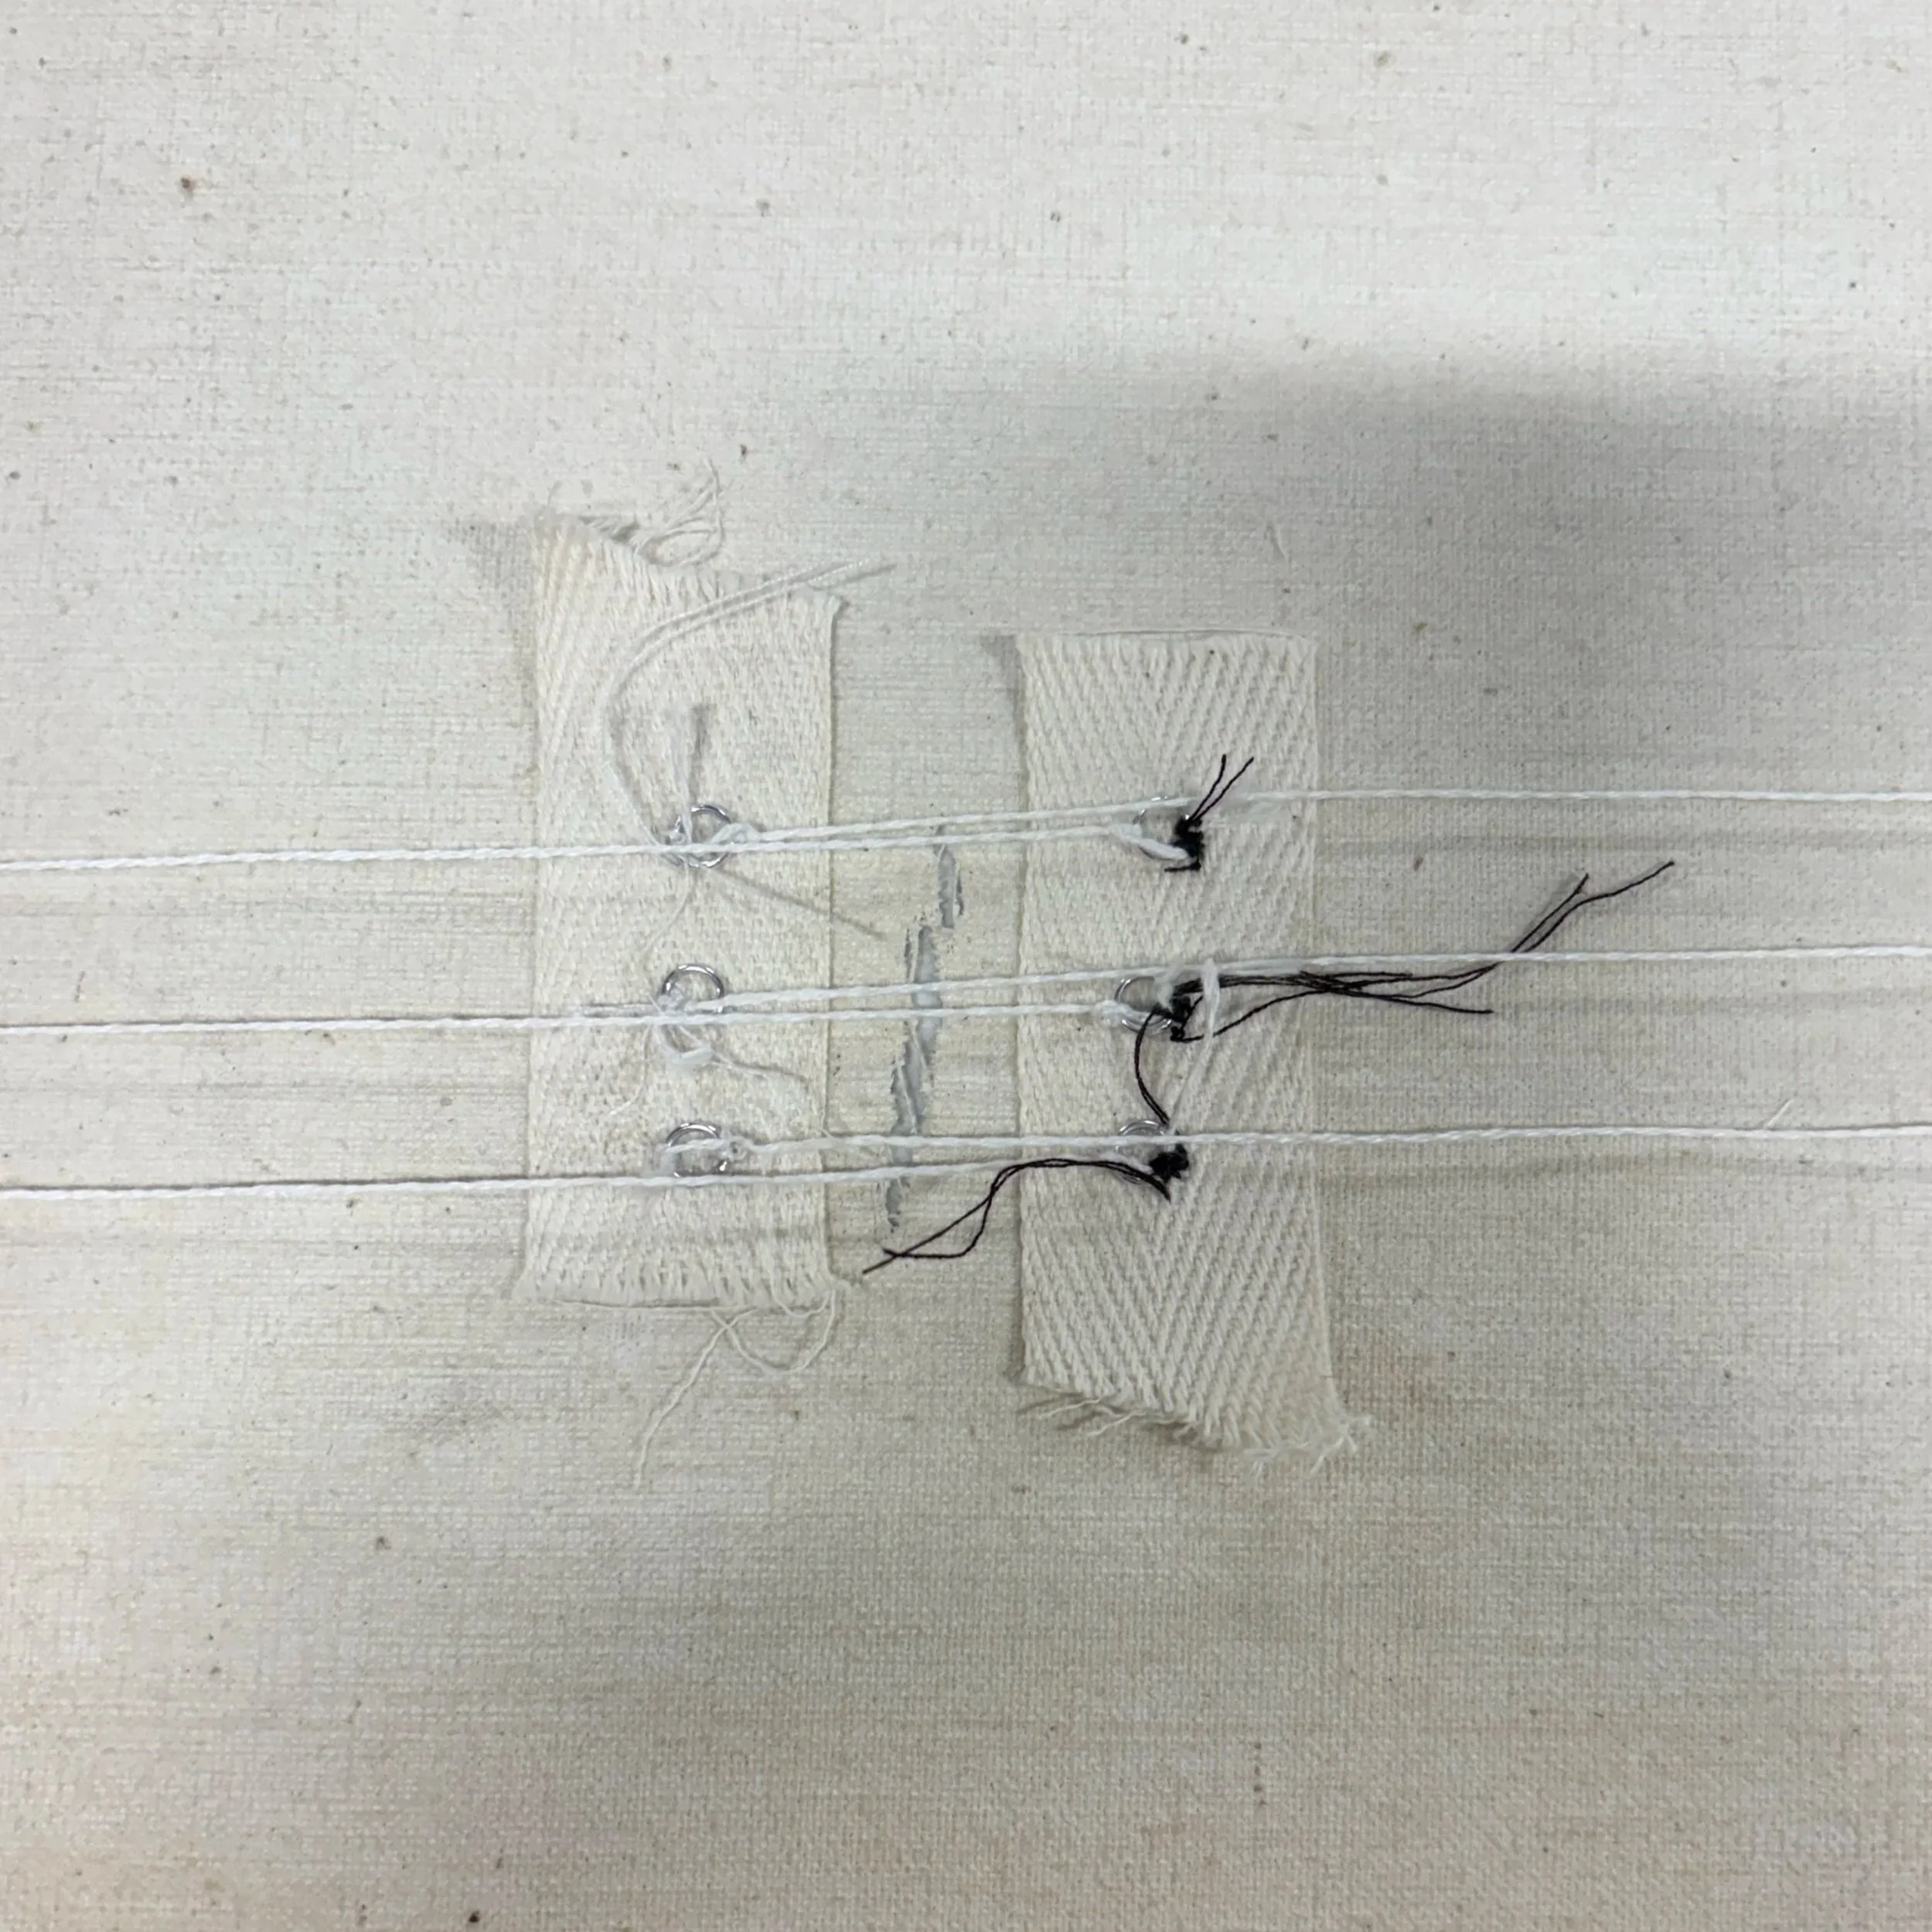
The First Trial: Using commercial cotton thread sewn on jump rings.
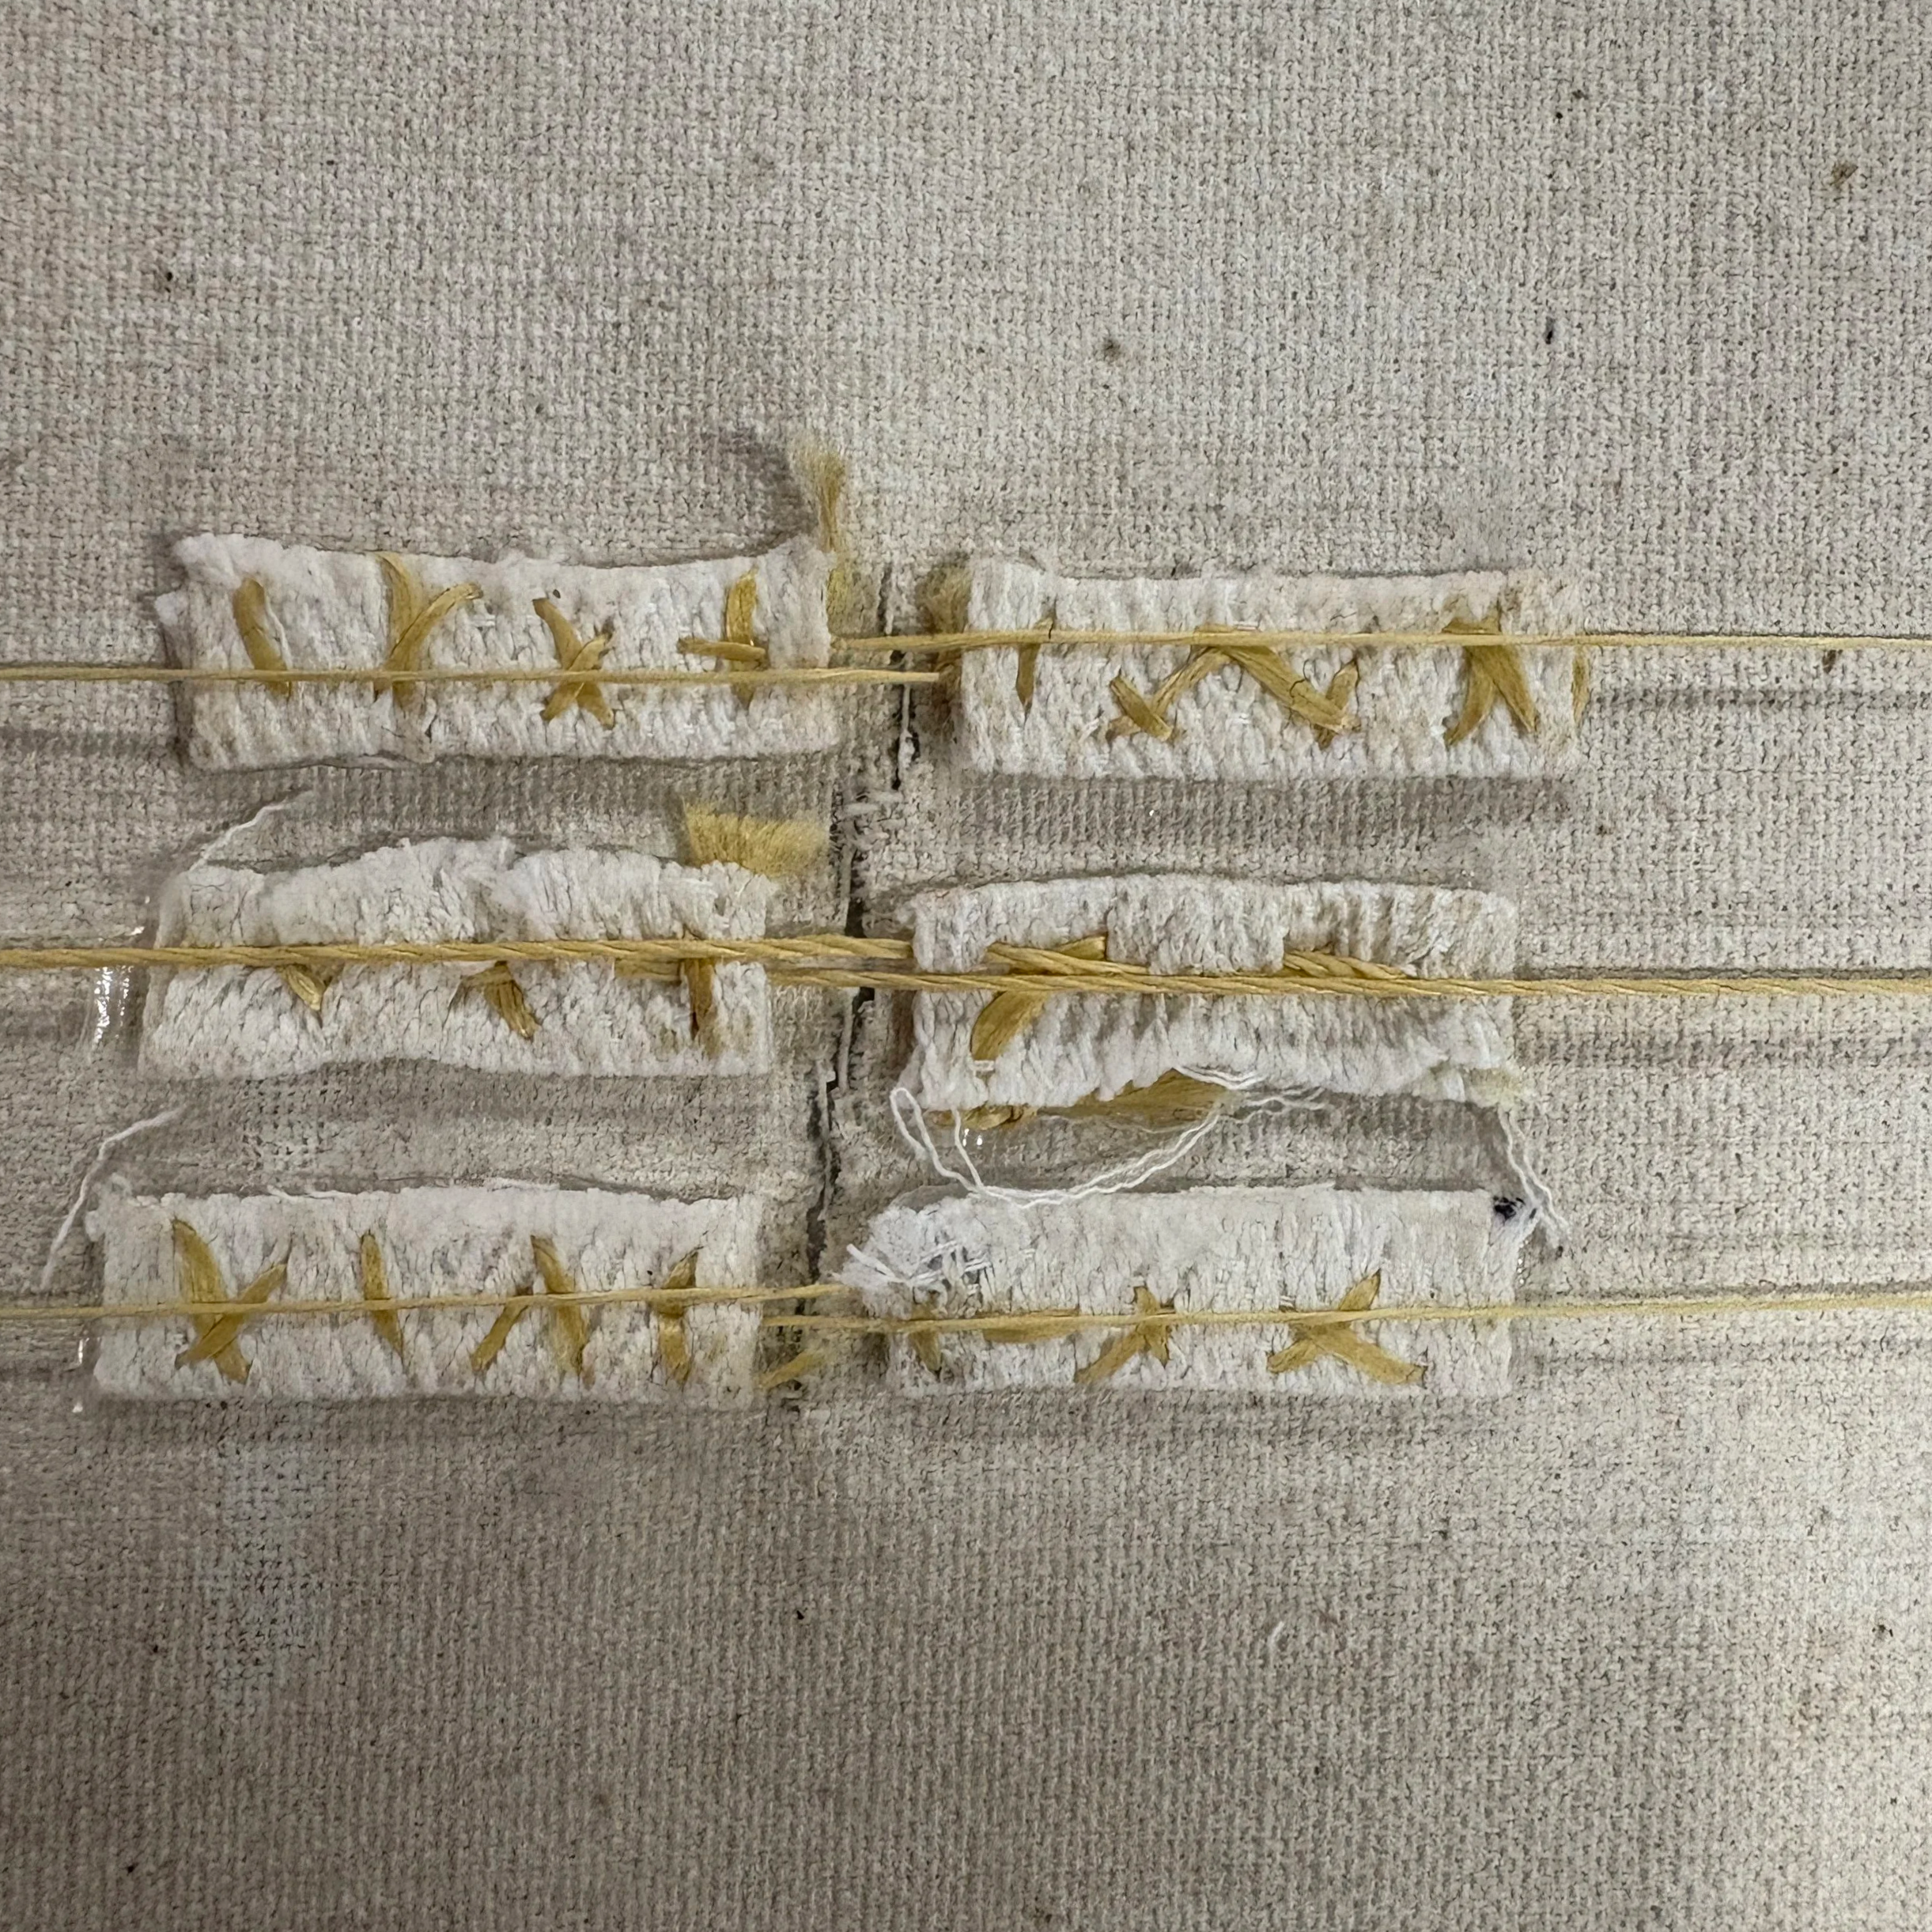
Final Set Up: Using Kevlar, and smaller twill tape strips.
We used three strands of Kevlar on each side of the tear attached in what we referred to as “twill tape sandwiches.” Then we ran into another issue, much trial and error went into the design of these sandwiches. At first, we were concerned that individual attachments might create scalloping at the edges of the tear, so we tried one piece of twill tape to minimize the risk
We sewed three jump rings and threads to a small piece of twill tape and used BEVA 371 Film (a reversible thermoplastic resin with very strong shear strength) to attach them to the canvas. Unfortunately, this method of attachment failed three times. One time the strand had snapped, another time the BEVA attachment failed, and the third time our jump rings ended up bending apart or ripping off the twill tape. In an ideal scenario, this method may be successful with a stronger adhesive and/or a longer tightening window.
After a few more proto types of the twill tape sandwiches, we found the one that worked for this treatment. We used Kevlar threads sewn onto individual twill tapes folded in half and adhered together with BEVA 371 film. The extra BEVA, twill tape, and sewing kept the strands firmly in place, see above.
Pulling it All Together…Pun Intended
Now that the trekker was all set up, we could finally start pulling the tear together. This process was slow and took place over the course of a few weeks. Our protocol consisted of tightening each side (one full rotation of the dowel nut) at the same time, two times a day, (once in the morning, and once at the end of the working day). This created a consistent rhythm that applied the minimum amount of tension required to move the canvas without breaking the threads or damaging the painting. After each rotation, the surrounding area was placed under snake weights to minimize excess warping of the canvas. We repeated this process until it appeared all sides of the tear were touching under magnification.
Rotating the Dowel Nuts using an Allen Key
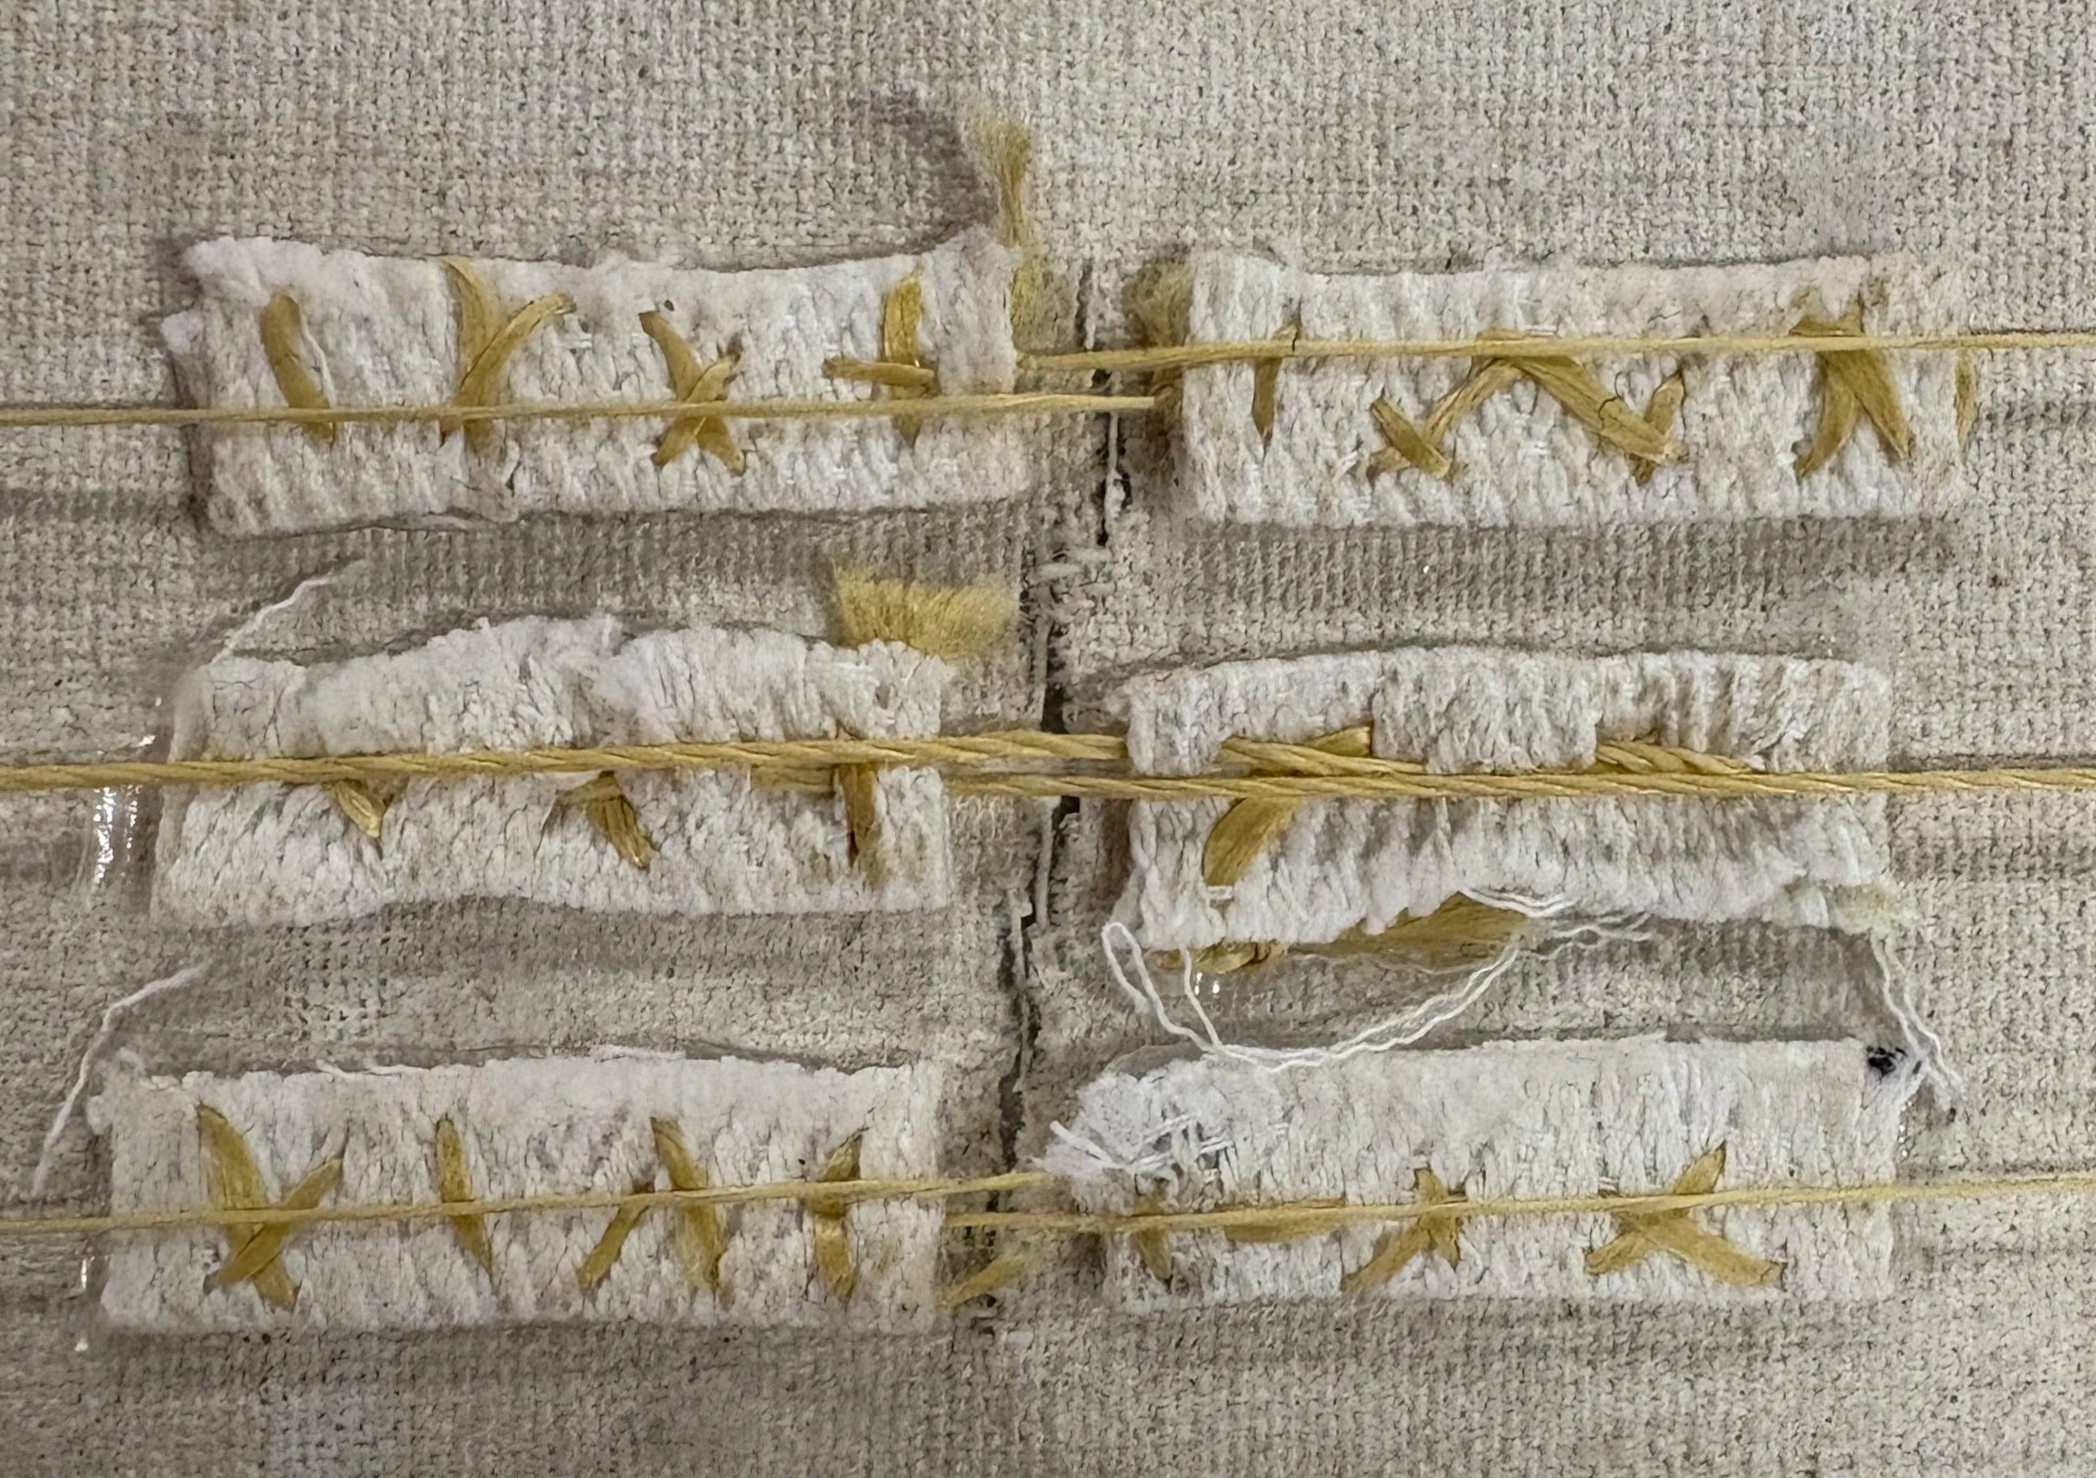
Detail of the Tear Touching After Tightening
To repair the tear, we decided to use a modified version of Heiber’s thread-by-thread mending technique. As mentioned in our Tear Mending blogpost, the technique involves micro-tools, such as tweezers and microhooks, to reweave the original warp and weft of the canvas. However, reweaving the vertical threads would have created needless complications and put the paint surface and/or existing canvas at risk.
Tear Mending at 16x Magnification: Sped up 5x its original speed
Choosing an adhesive to mend with was the next challenge. Cotton tends to fray more than linen, so before joining, we sized each horizontal thread with diluted Jade-R, a flexible acrylic adhesive.
This particular painting was quite taught and butt join repairs are naturally weaker. Hannah Flock’s 2023 research found that a mixture of sturgeon glue and cellulose fiber has the highest tensile strength for a butt join, so that is what we used.
All of the horizontal canvas threads that were able to be butt-joined together were adhered using a mixture of 25% sturgeon glue in DI water combined with Solka-Floc 10® Cellulose powder at a 20:1 v/v. A sized linen bridge thread was used to close up existing threads that were not touching. The Kevlar threads did obscure small areas of torn threads, but these were mended after all the visible threads were mended, and the twill tapes were removed. Finally, we reinforced our mend on the back using thin synthetic tissue attached with Beva Film.
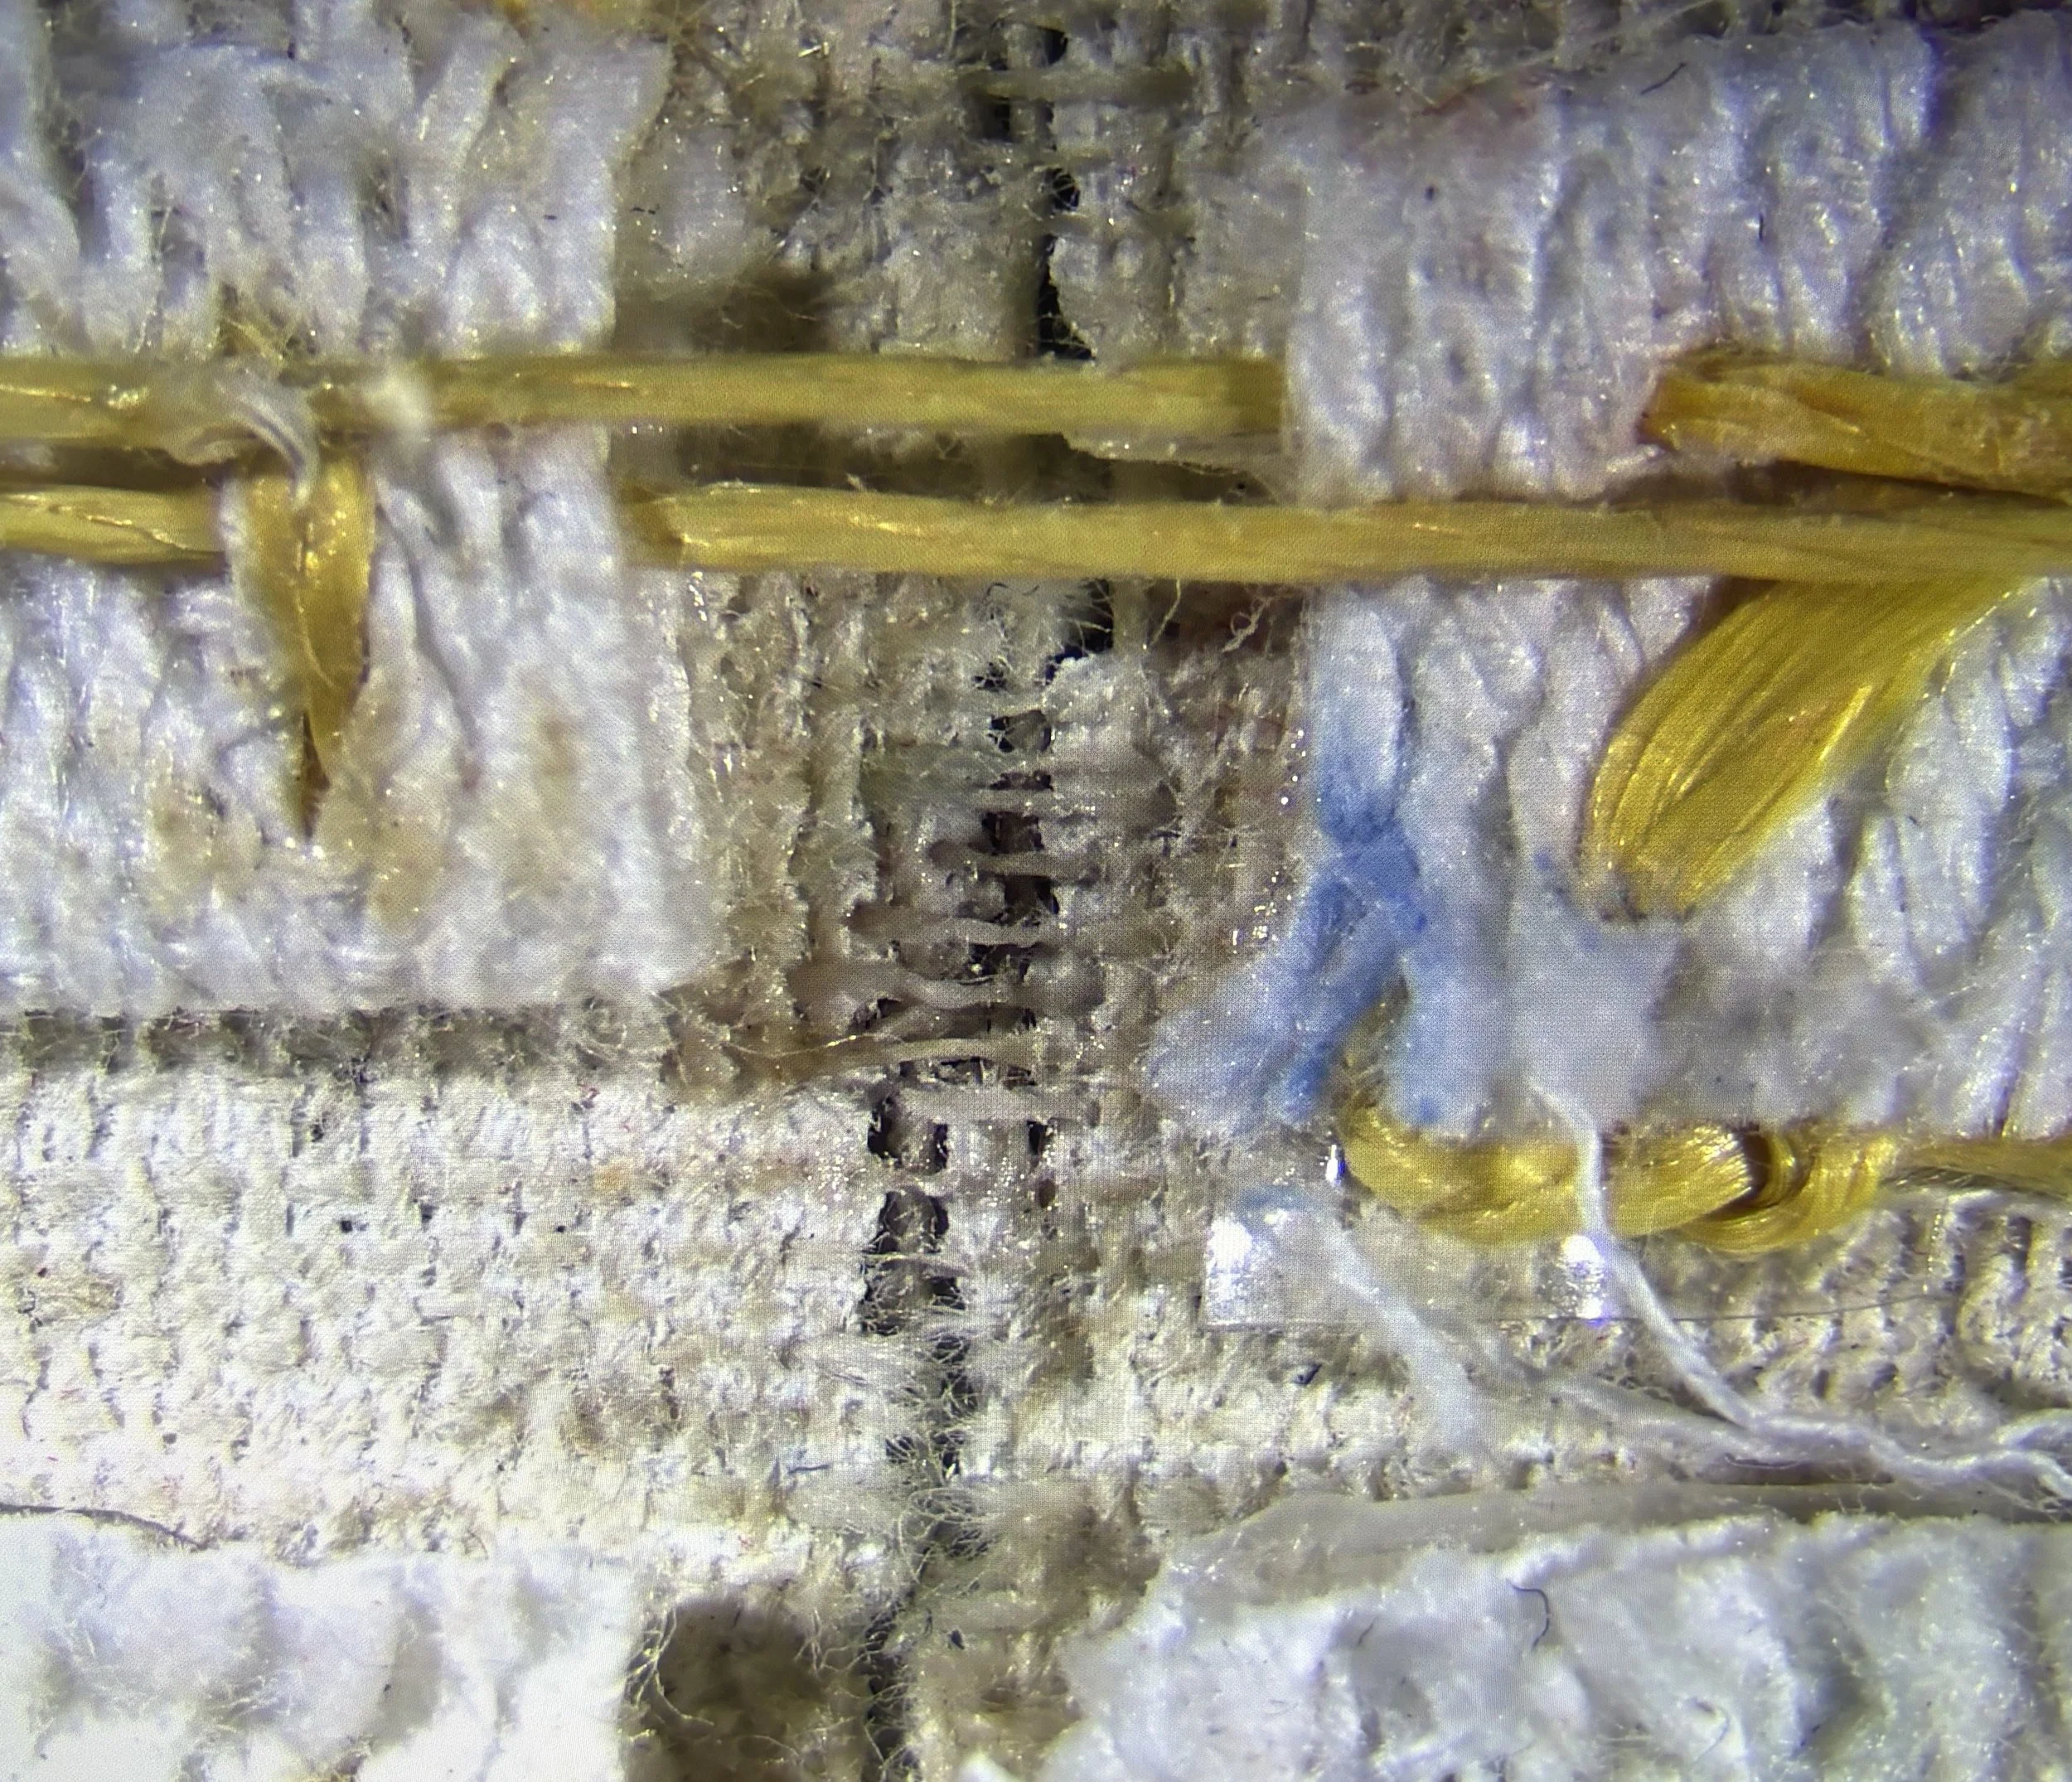
16x Detail of Kevlar Strands Obscuring Part of the Tear Mid-mend
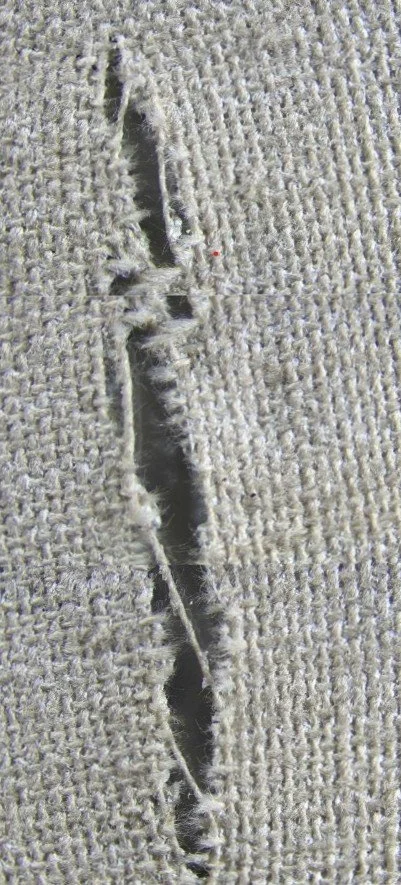
8x Detail of Tear Before Mending

8x Detail of Tear After Mending
The rest of the treatment consisted of reintegrating that small area of loss left from the tear. We made a textured fill consisting of Aquazol® 200, chalk, and acrylic gesso. Then we textured it using a scalpel under a microscope. We inpainted the fill and small abrasions using Gouache.
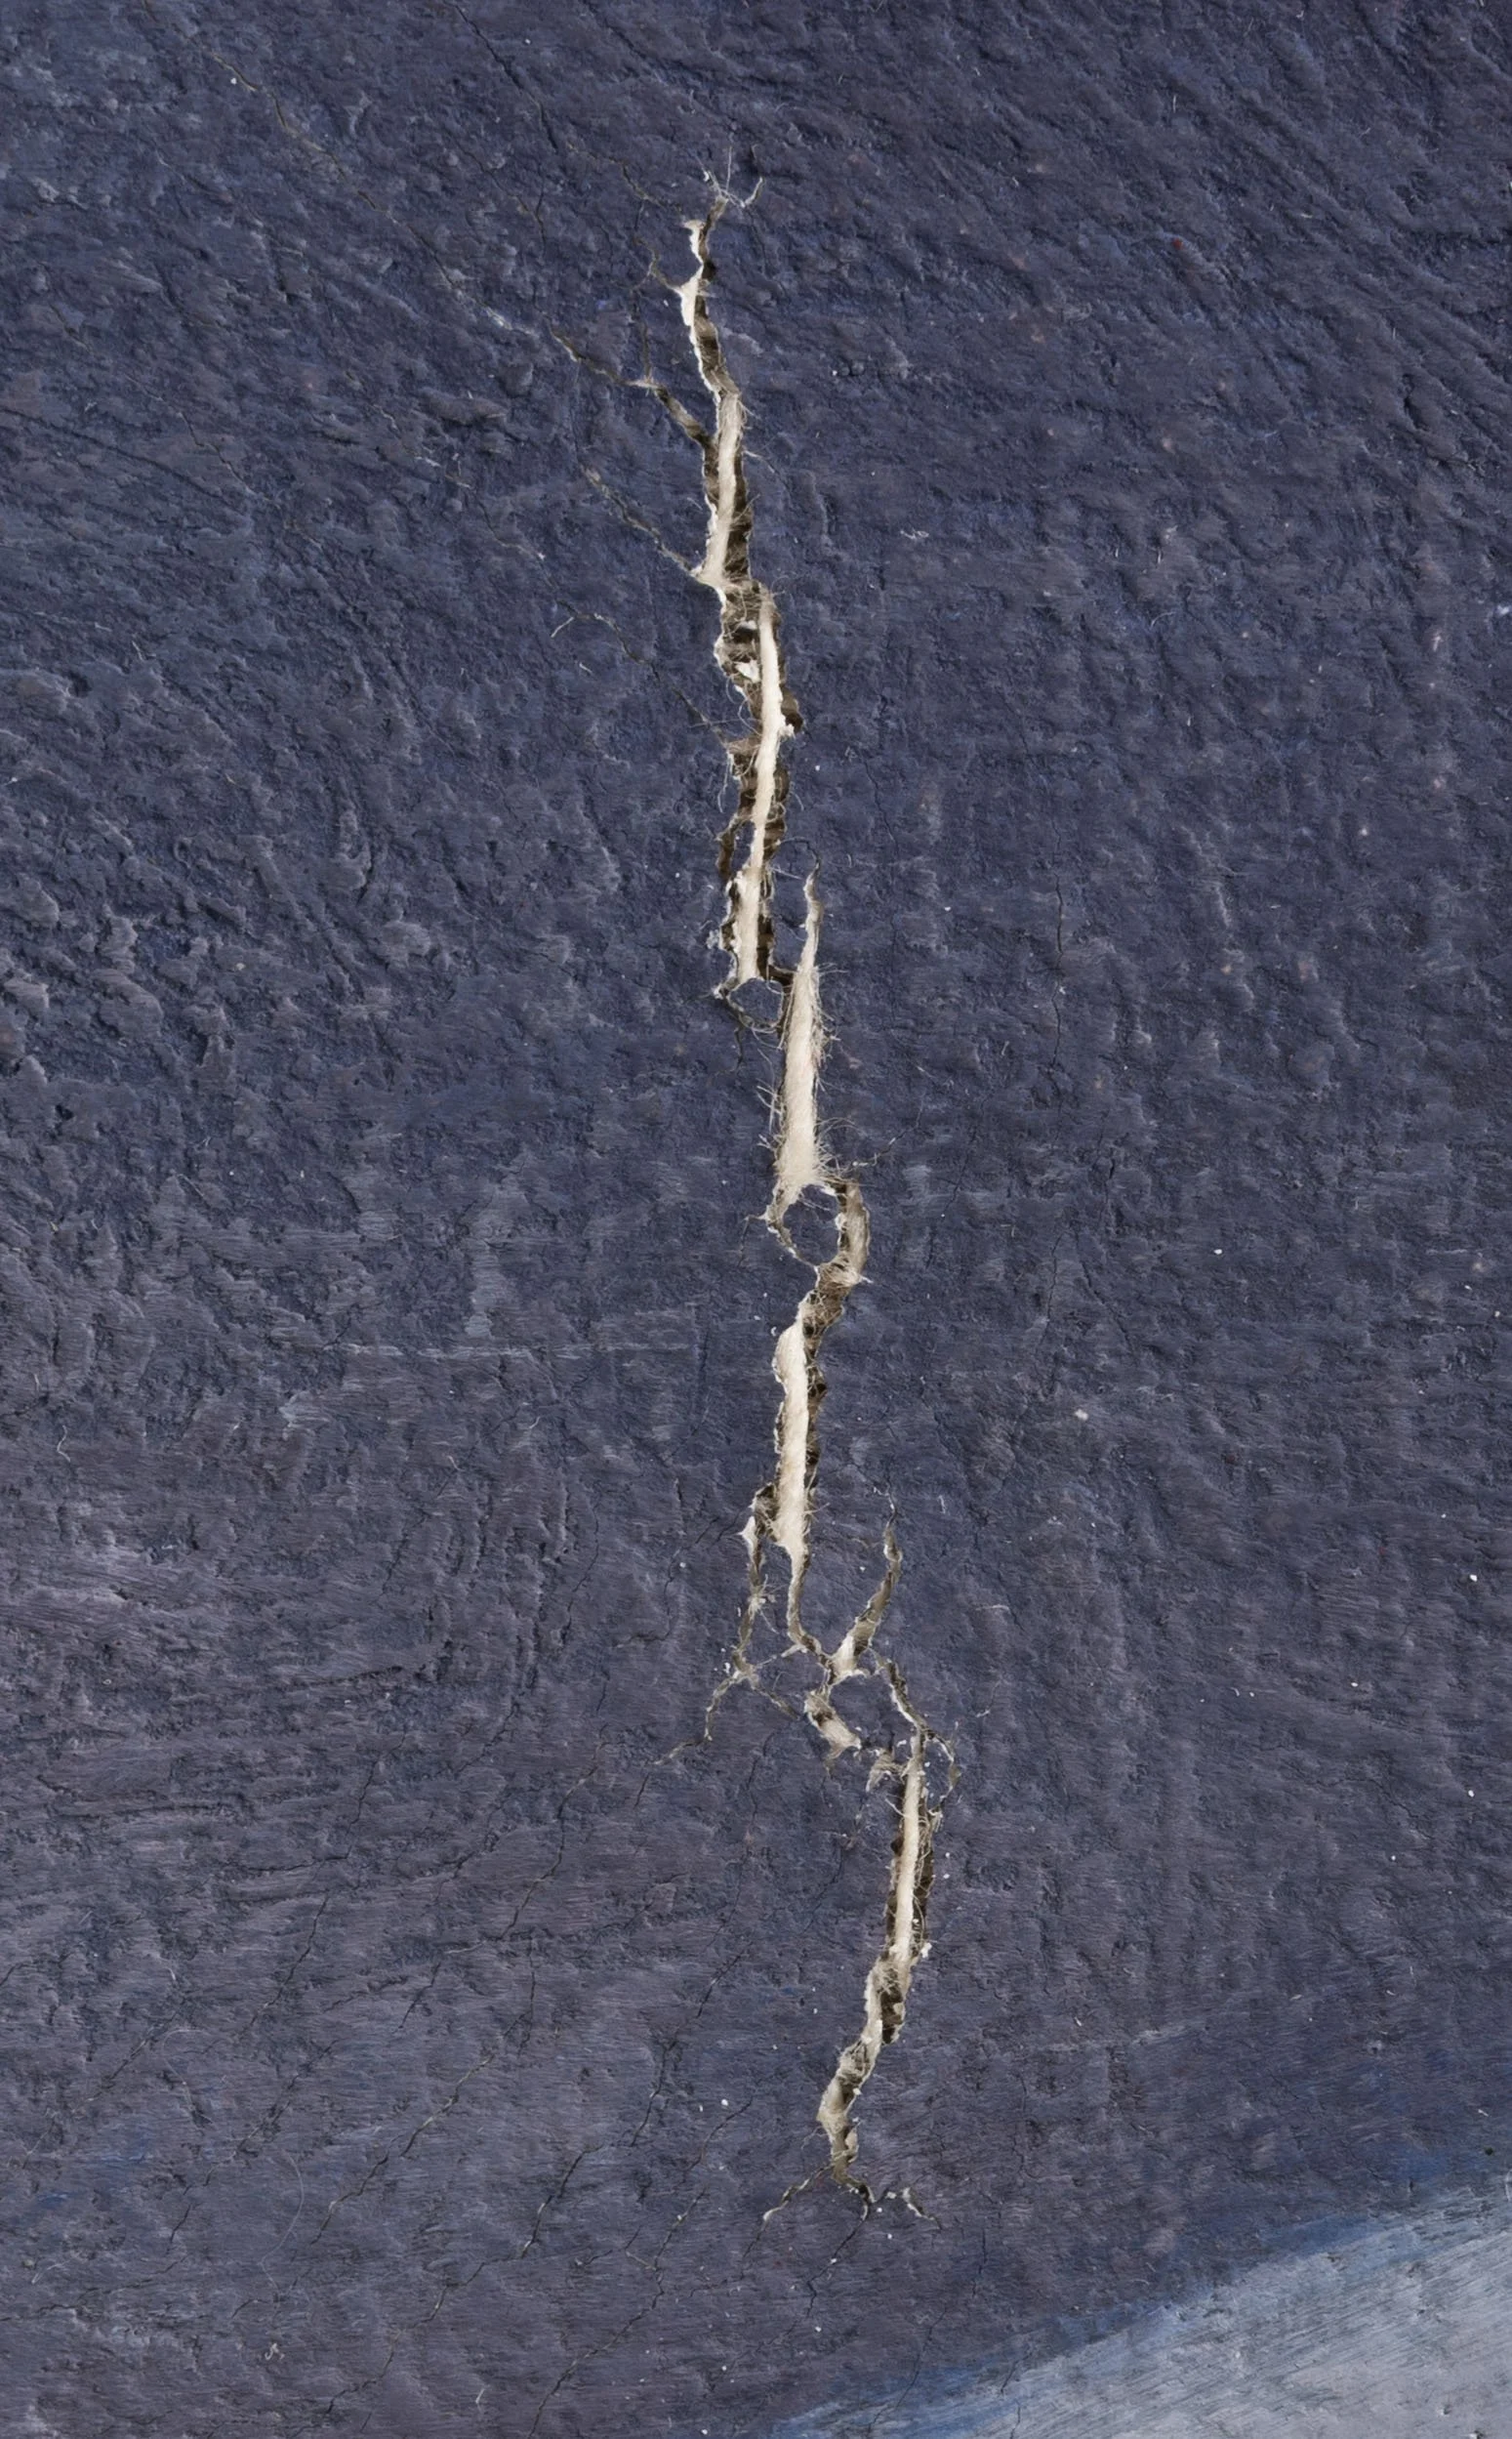
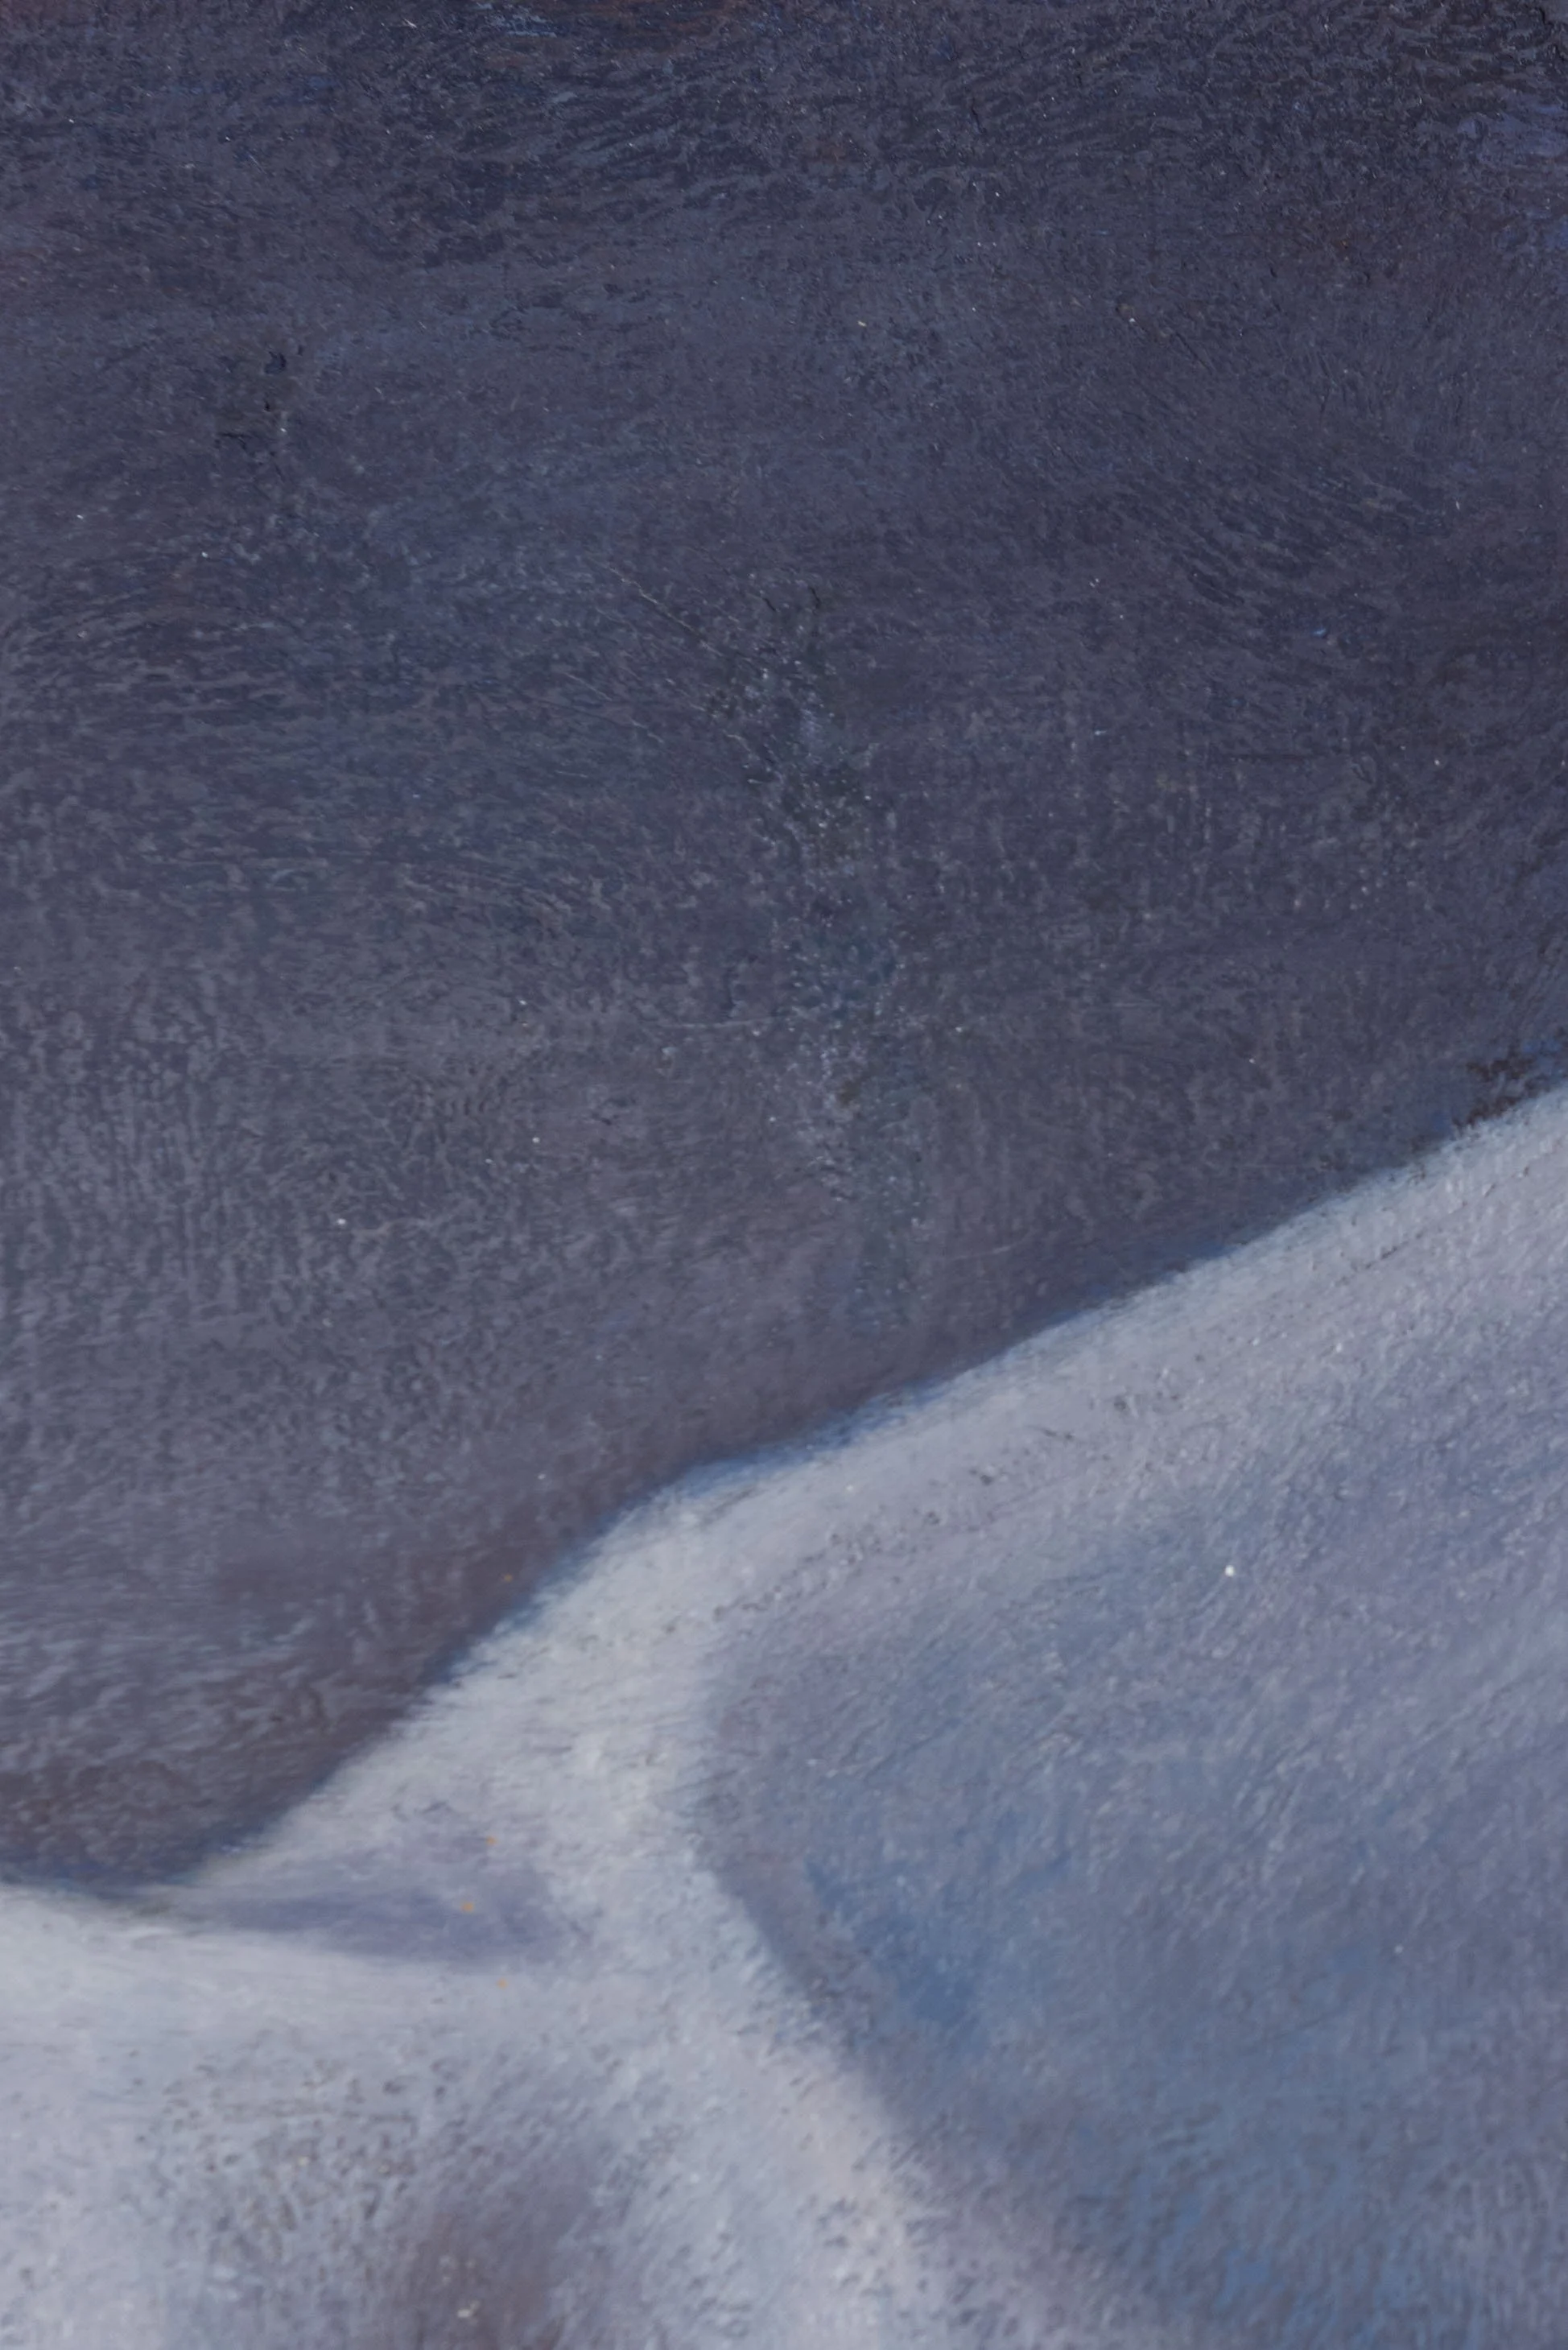
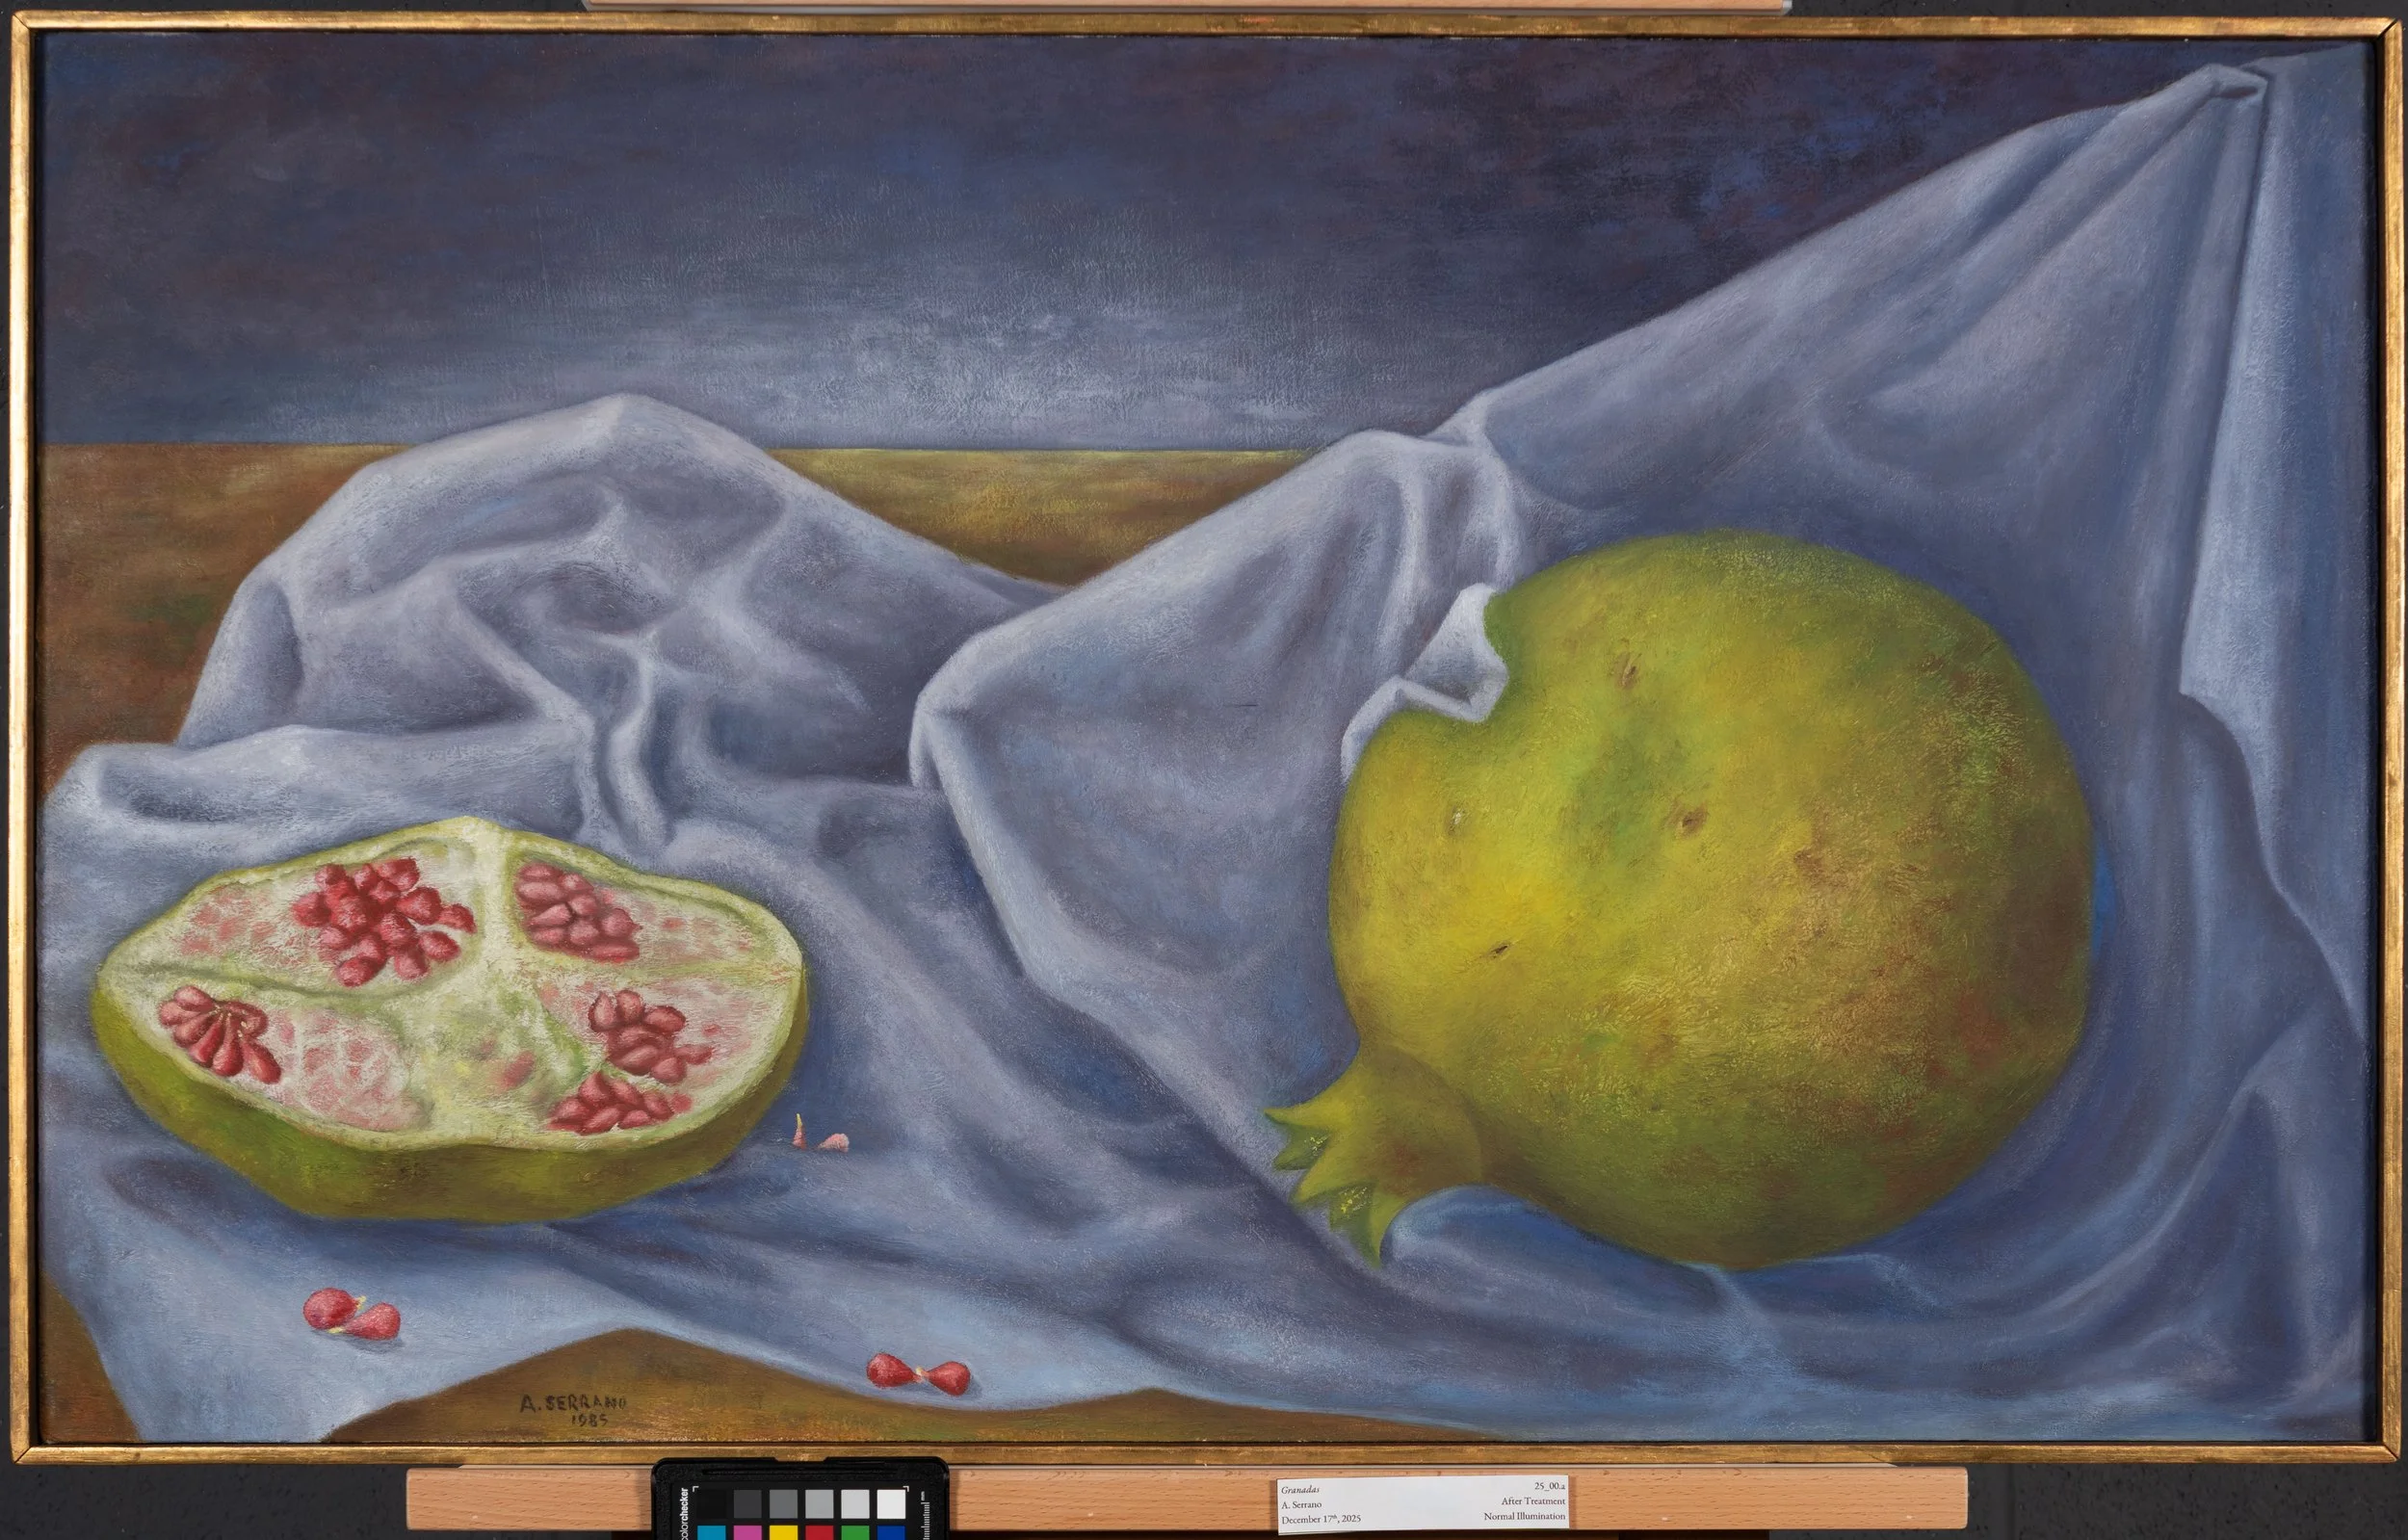
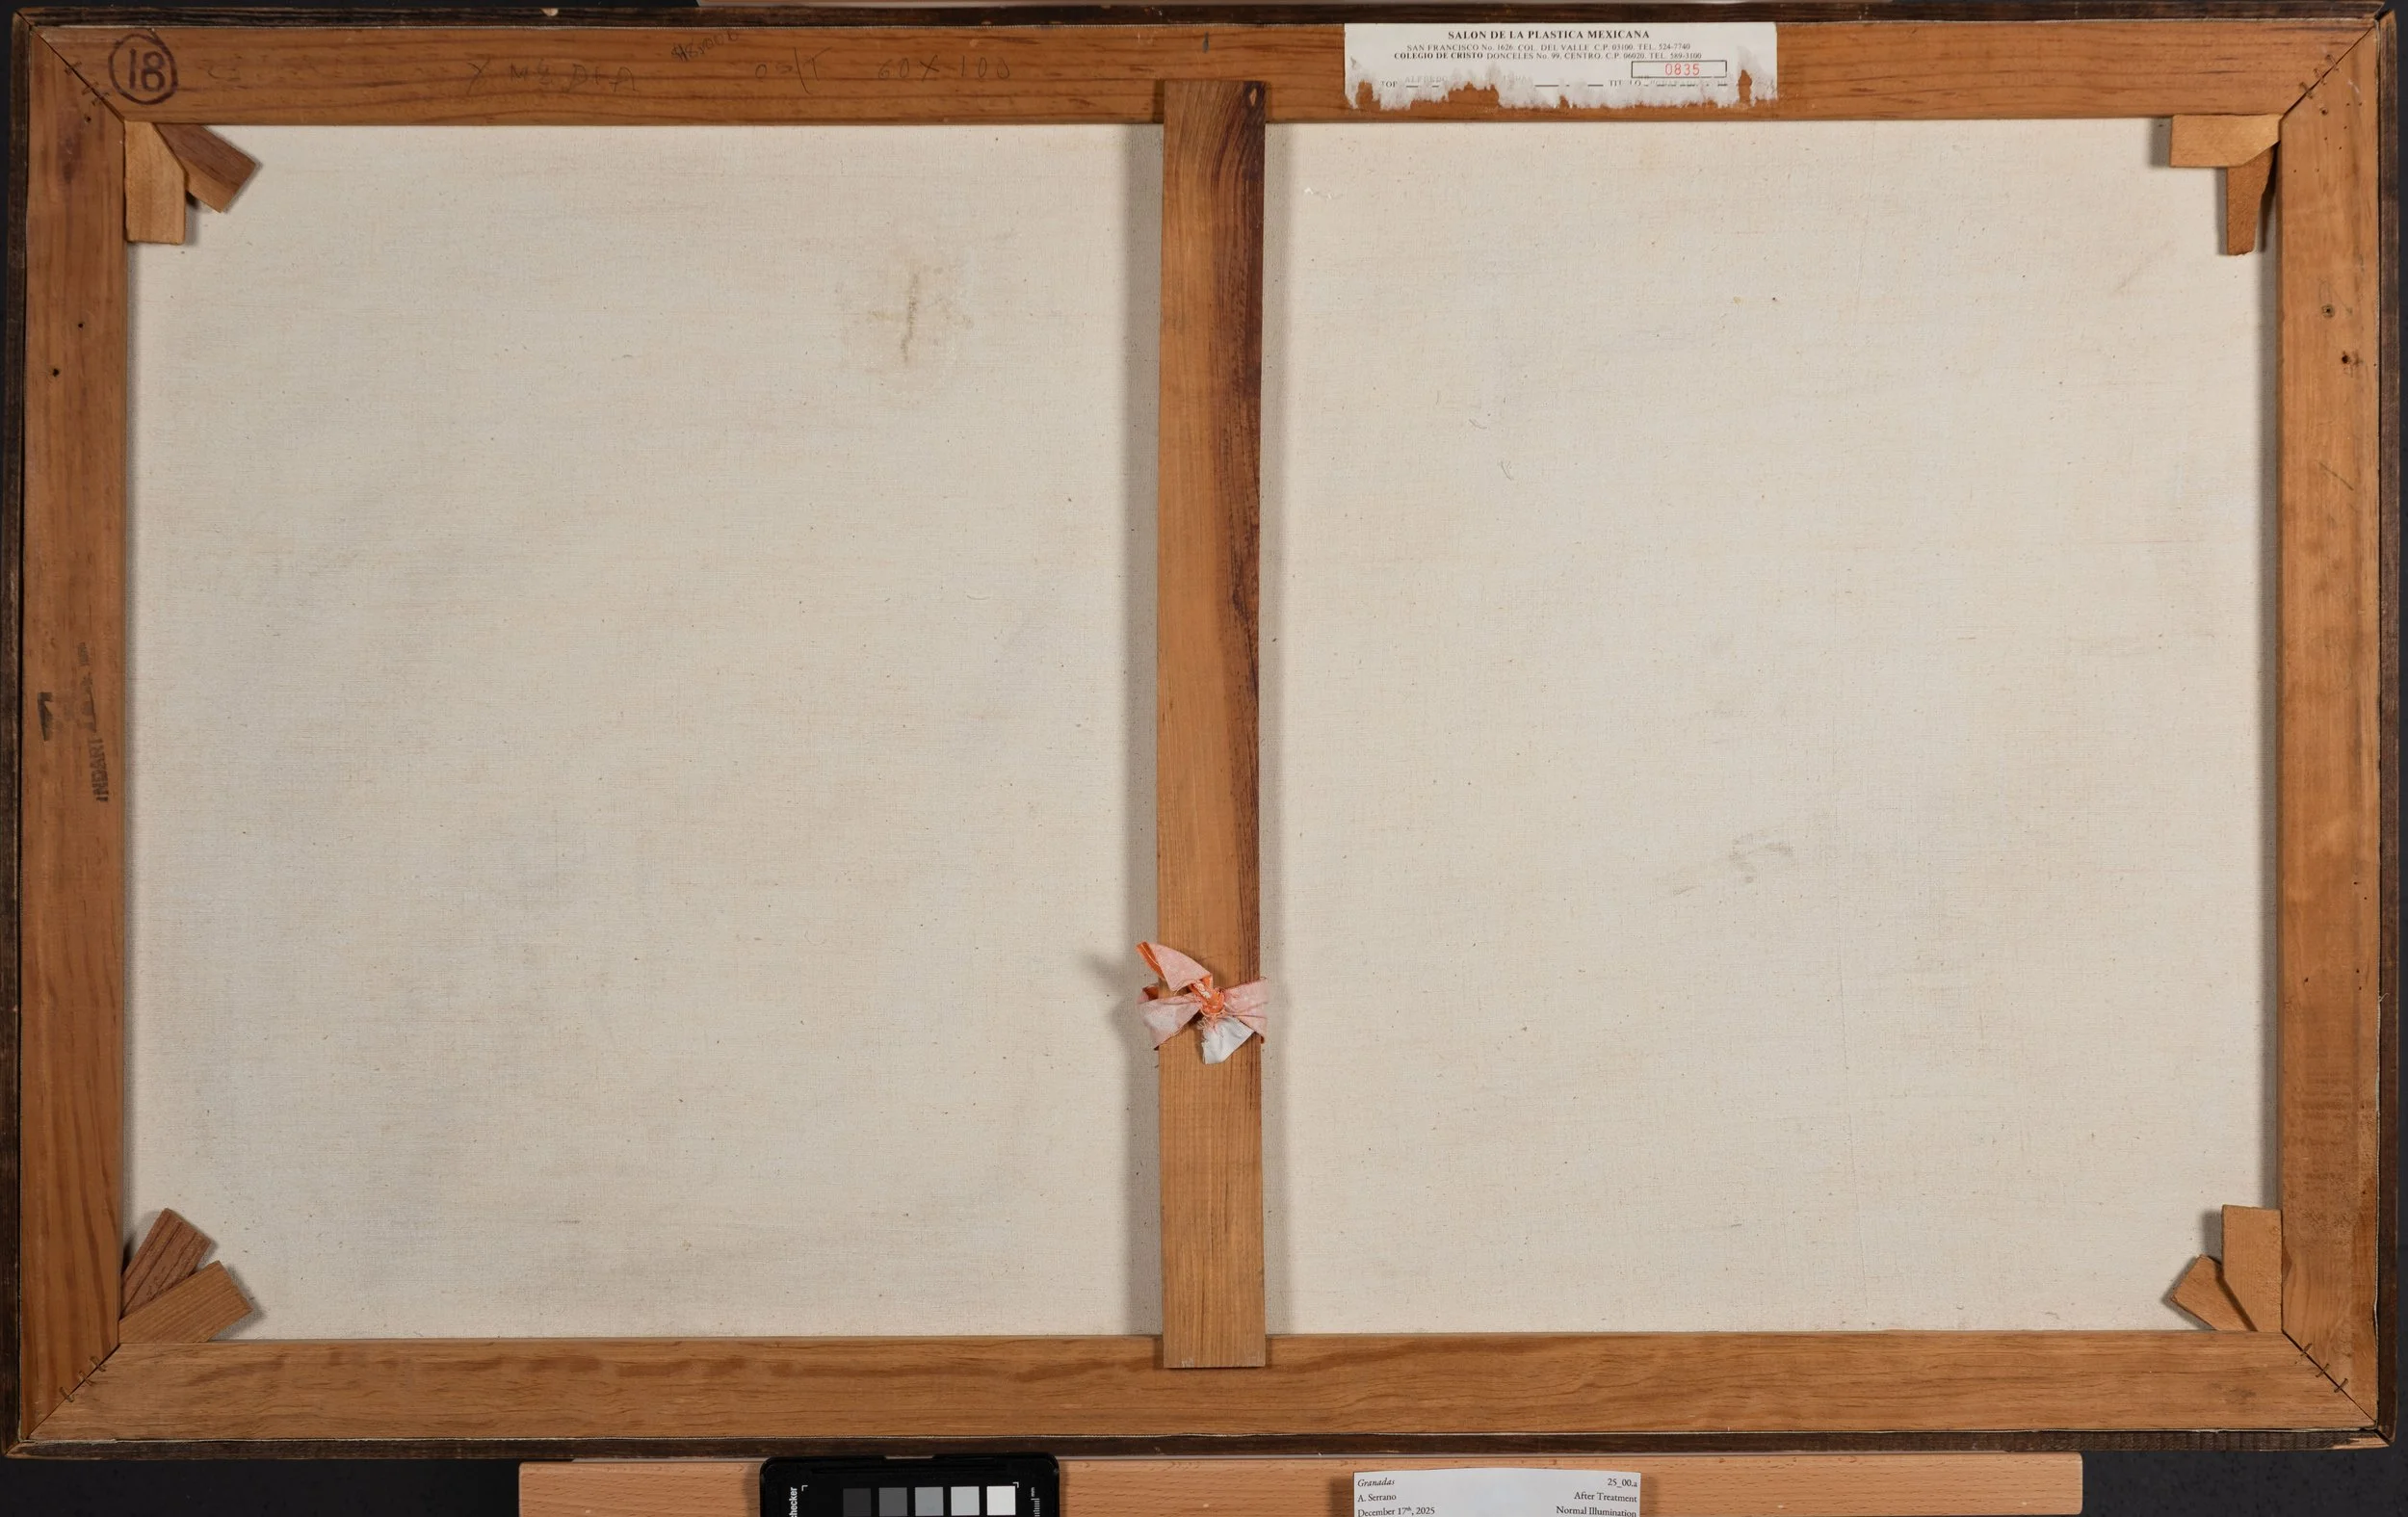
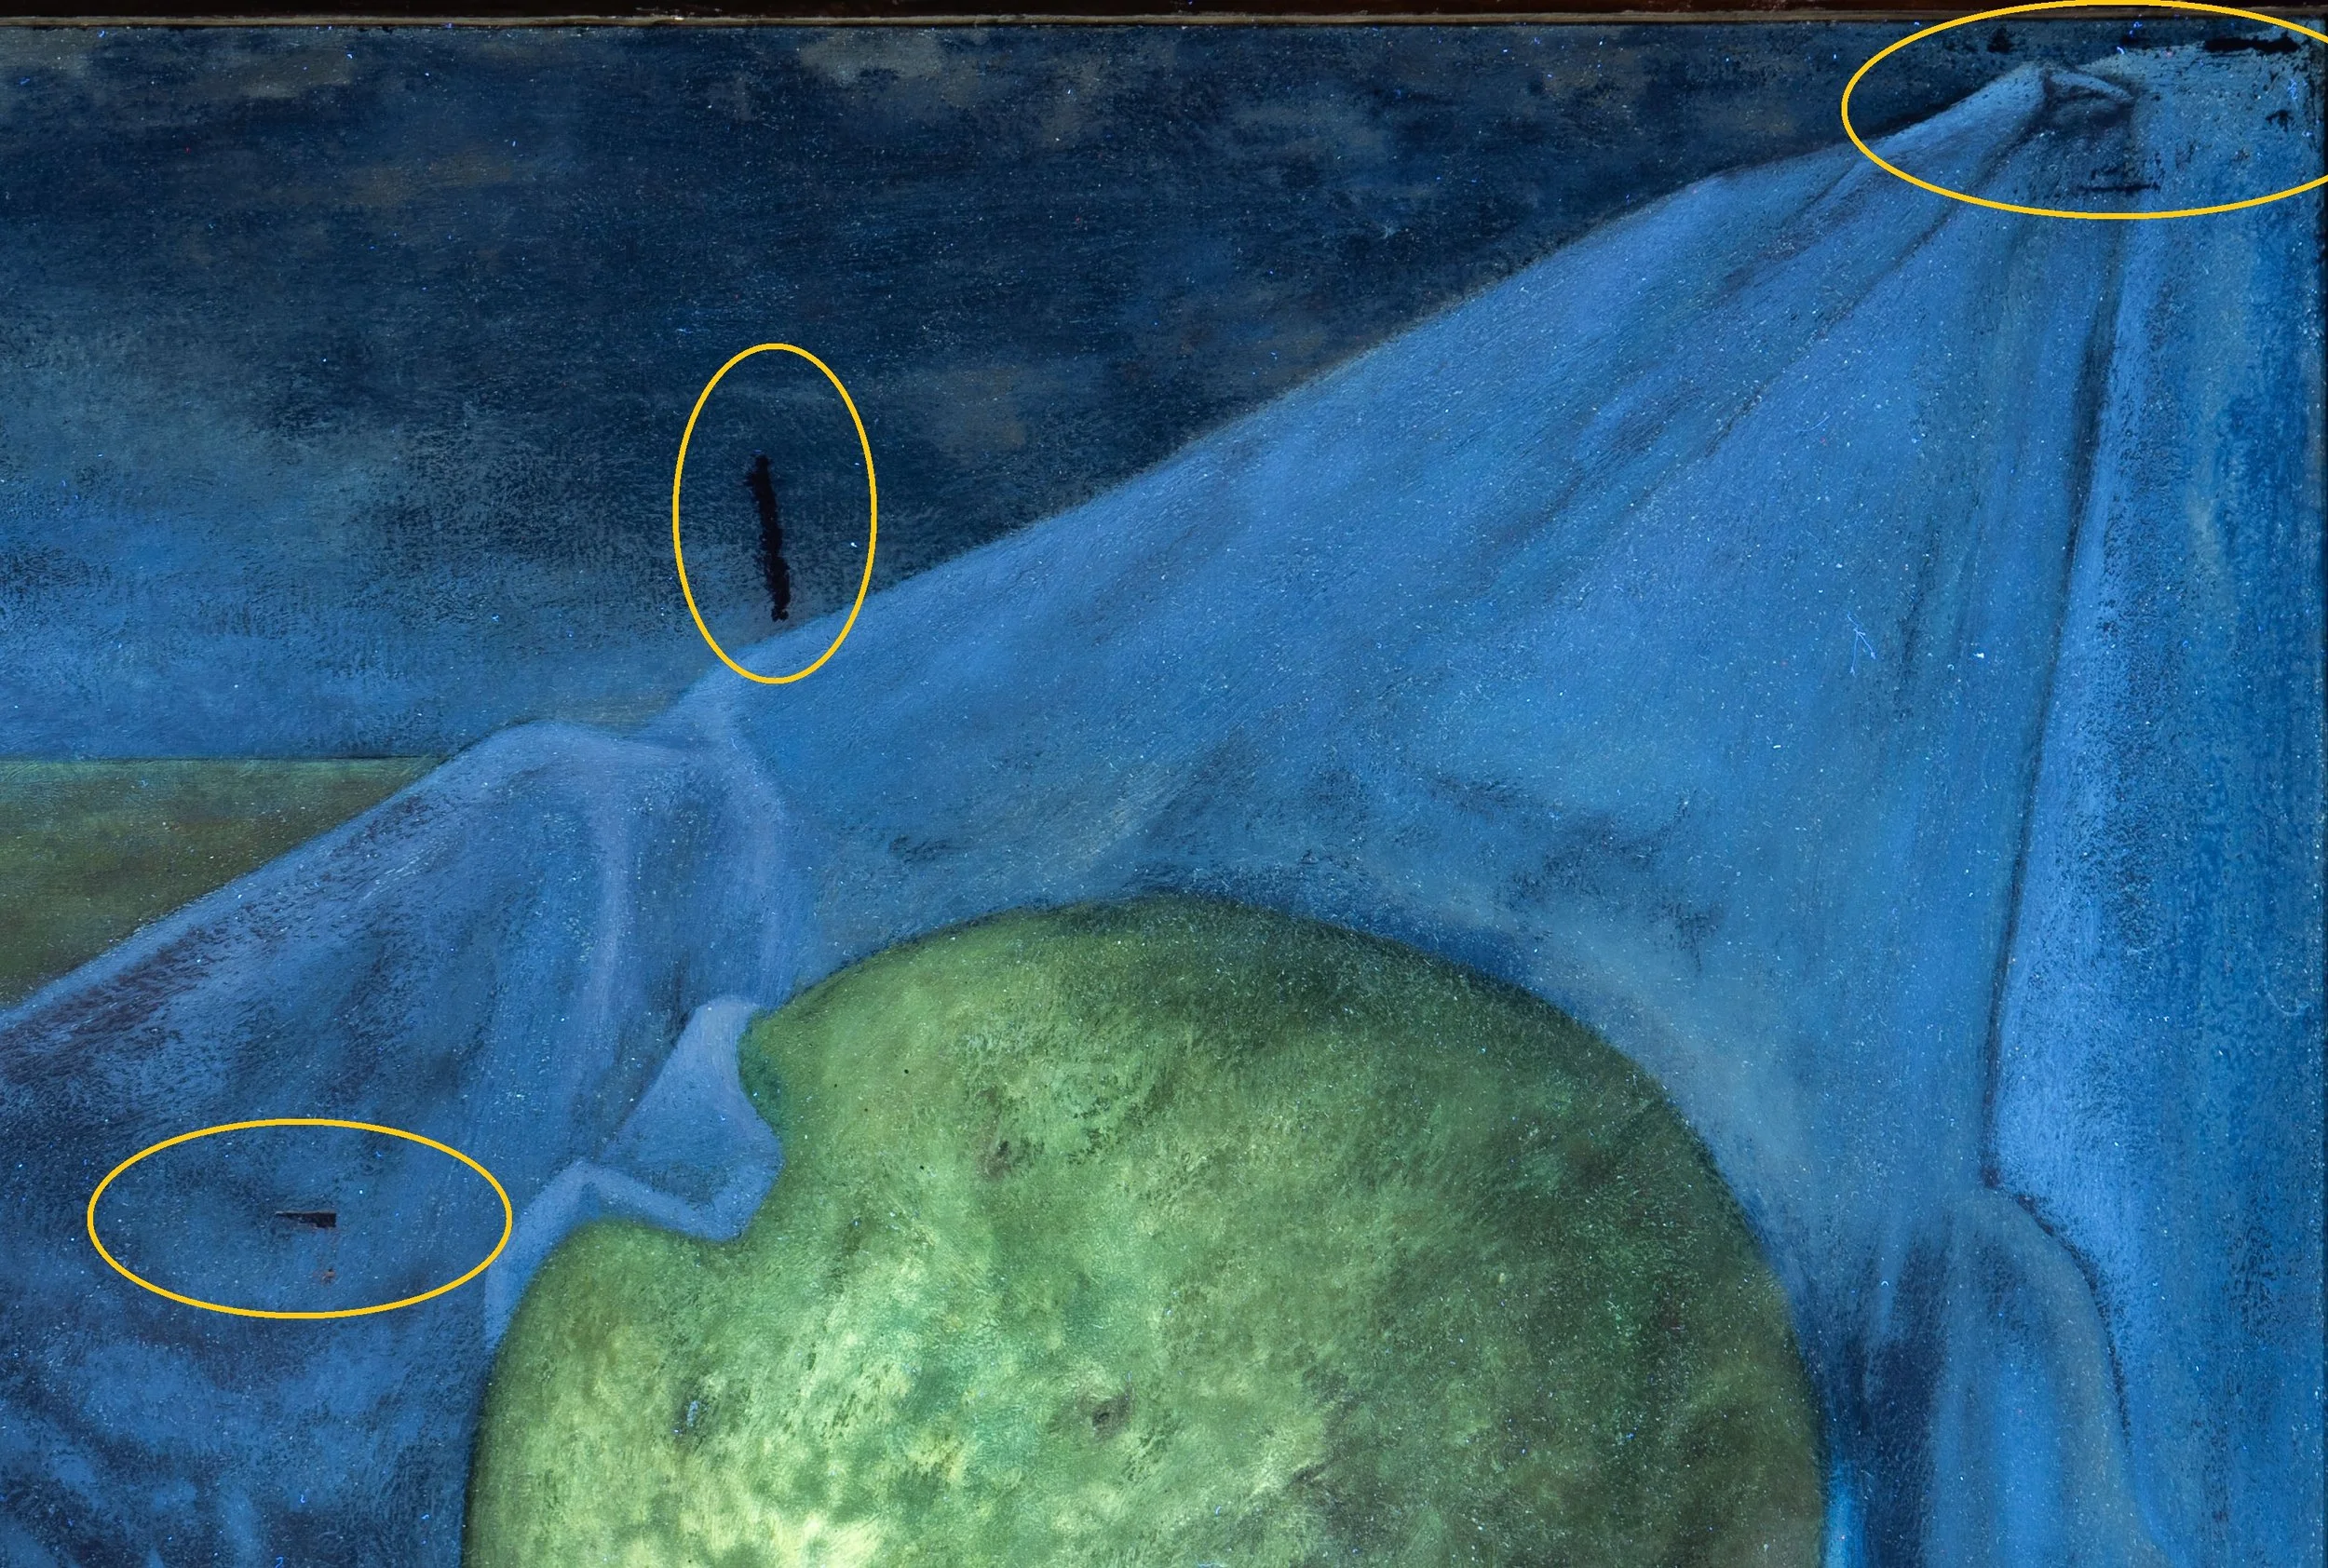
We are happy with how this treatment turned out and learned a lot about how to set up for a gapping tear mend with a particular resistant canvas, we cannot WAIT to use the RH Trekker again!